Steinway B #139085
Sound Board Project
Home About Services Resources Conservation Restoration Previous Restoration For Sale
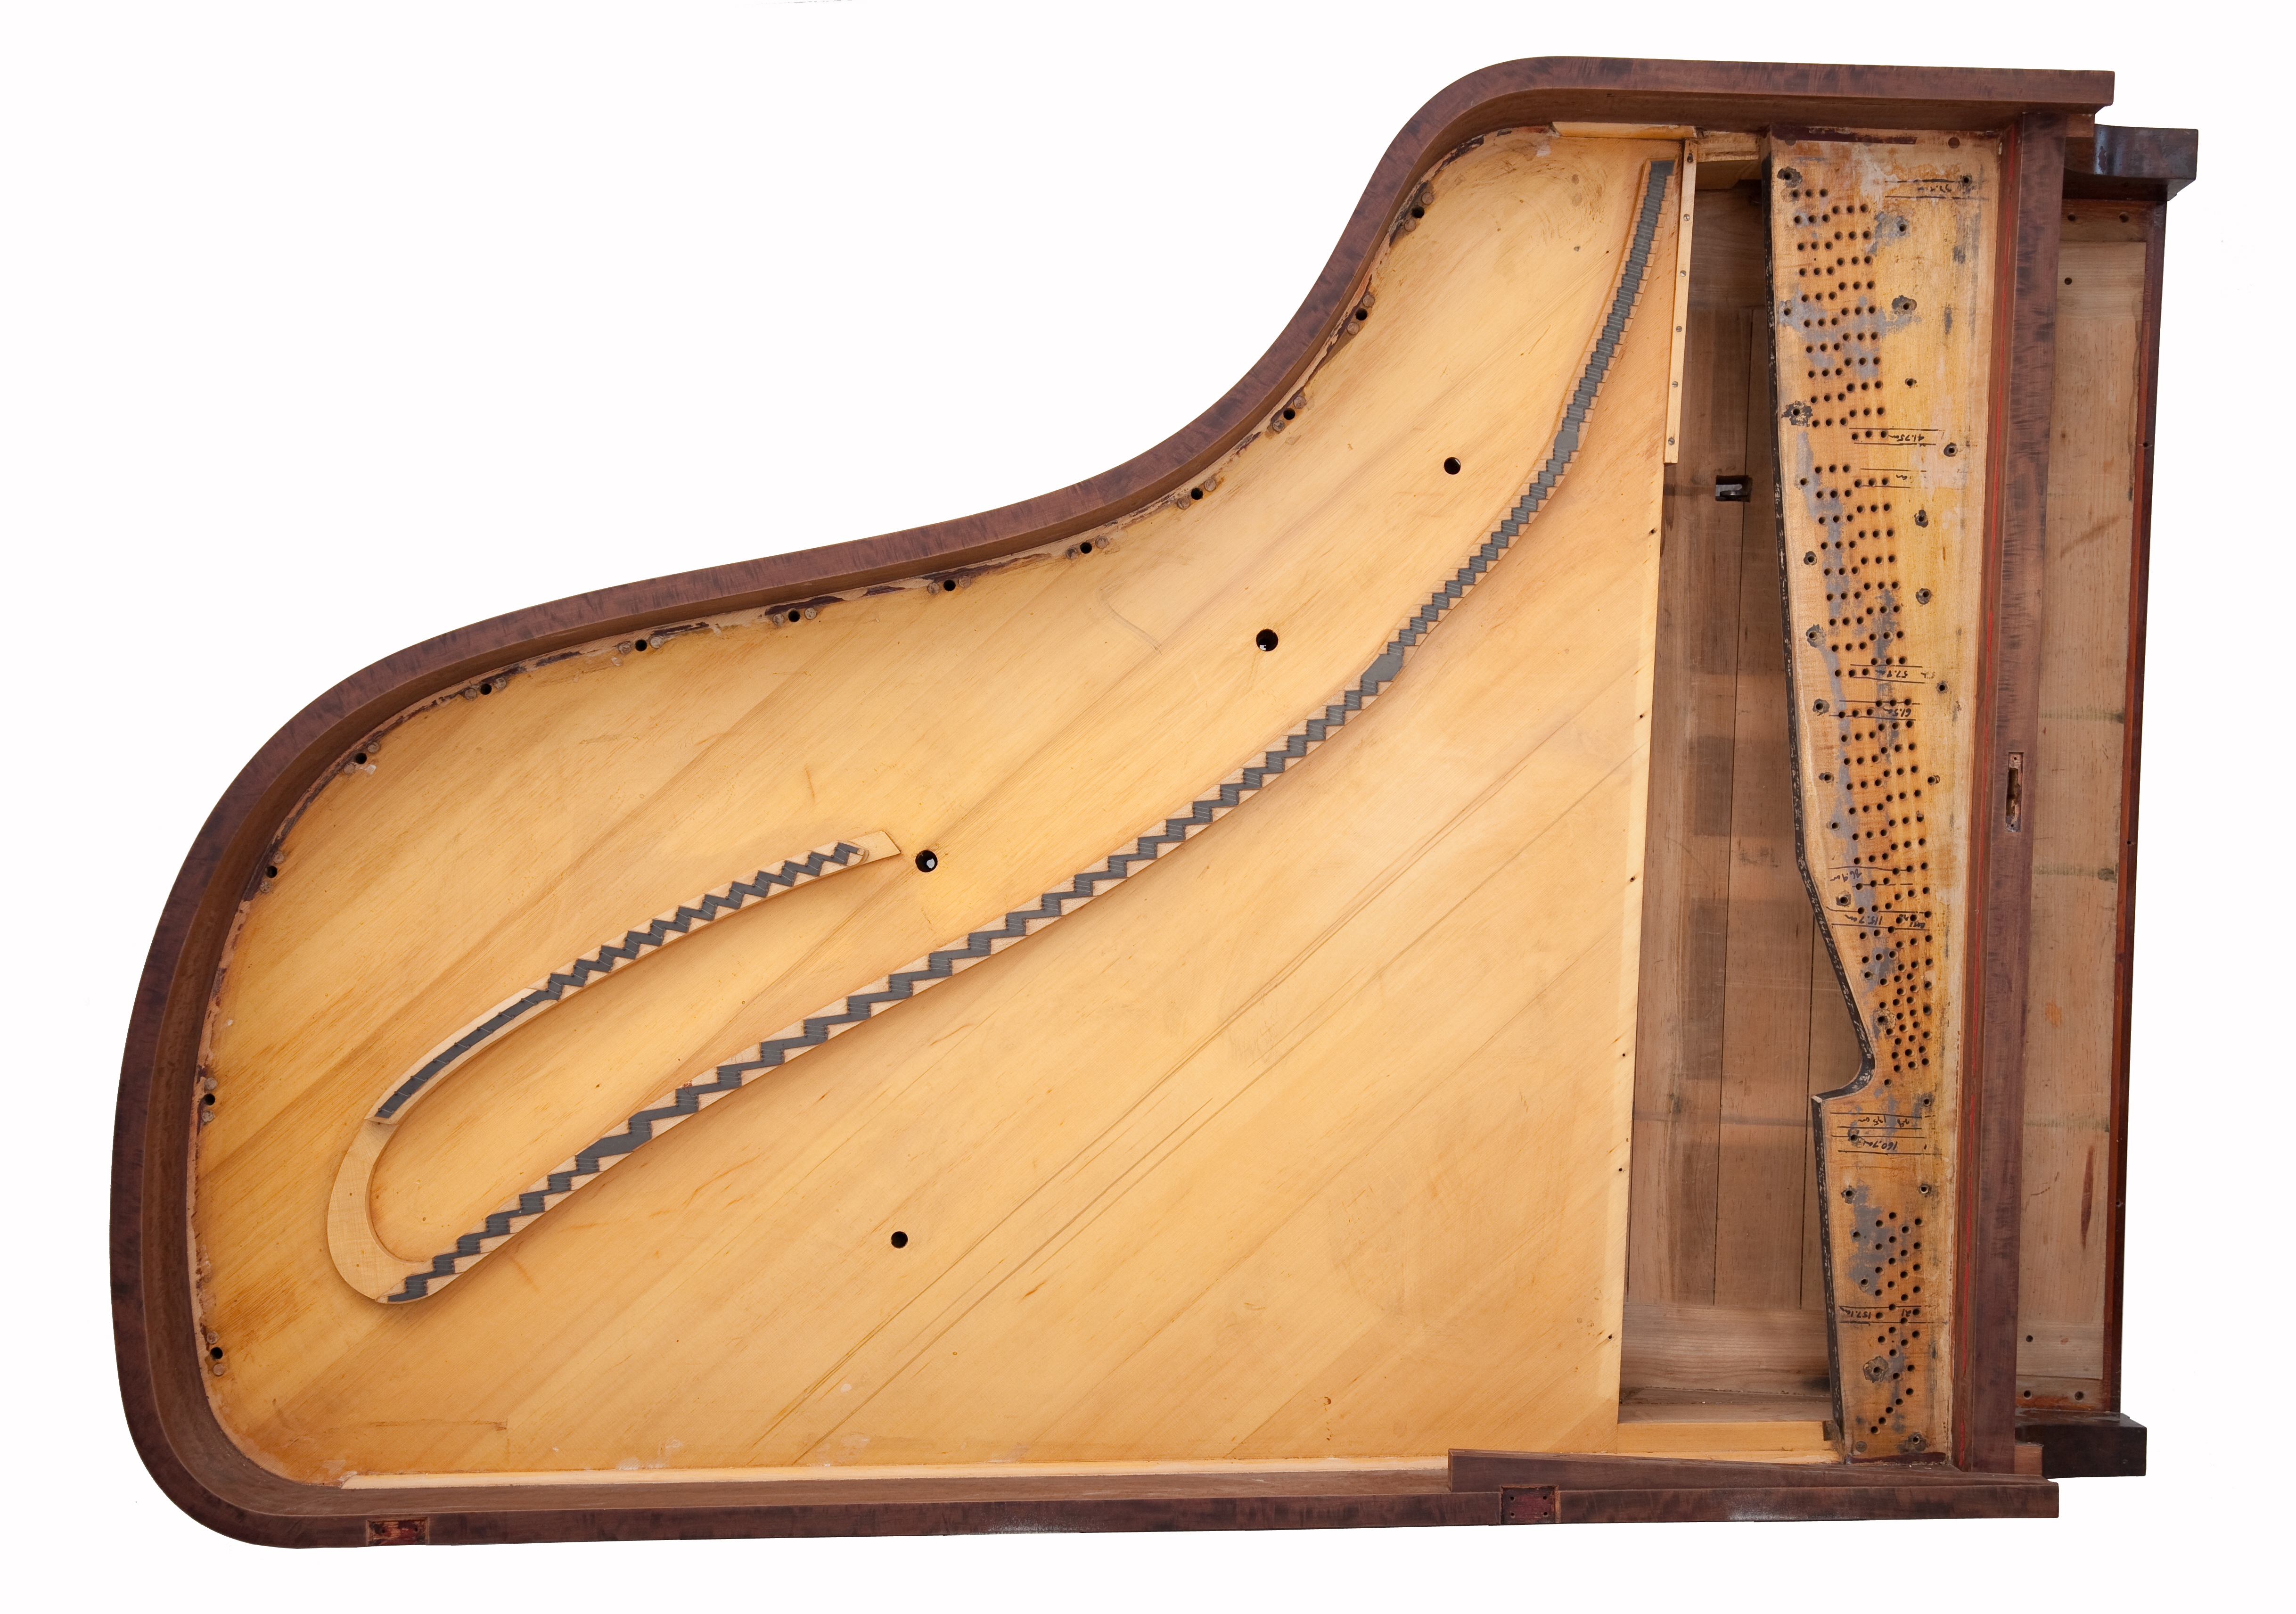
This is a plan view taken for documentation purposes. For documentation we take these following photo's before removing the sound board.
The piano was photographed against a white background to make it easier to isolate.
Each of these photo's that appear are linked to a full resolution .jpg. Put your mouse pointer on the selected image and L click. This will now display the linked image. L click will enlarge the image on your screen. Or, R click, choose "Save As" and the full image can be saved to your computer.

The maker of the original spound board has signed his name here. Steinways as well as many other makers were signed in various places by the craftsman who worked on them.
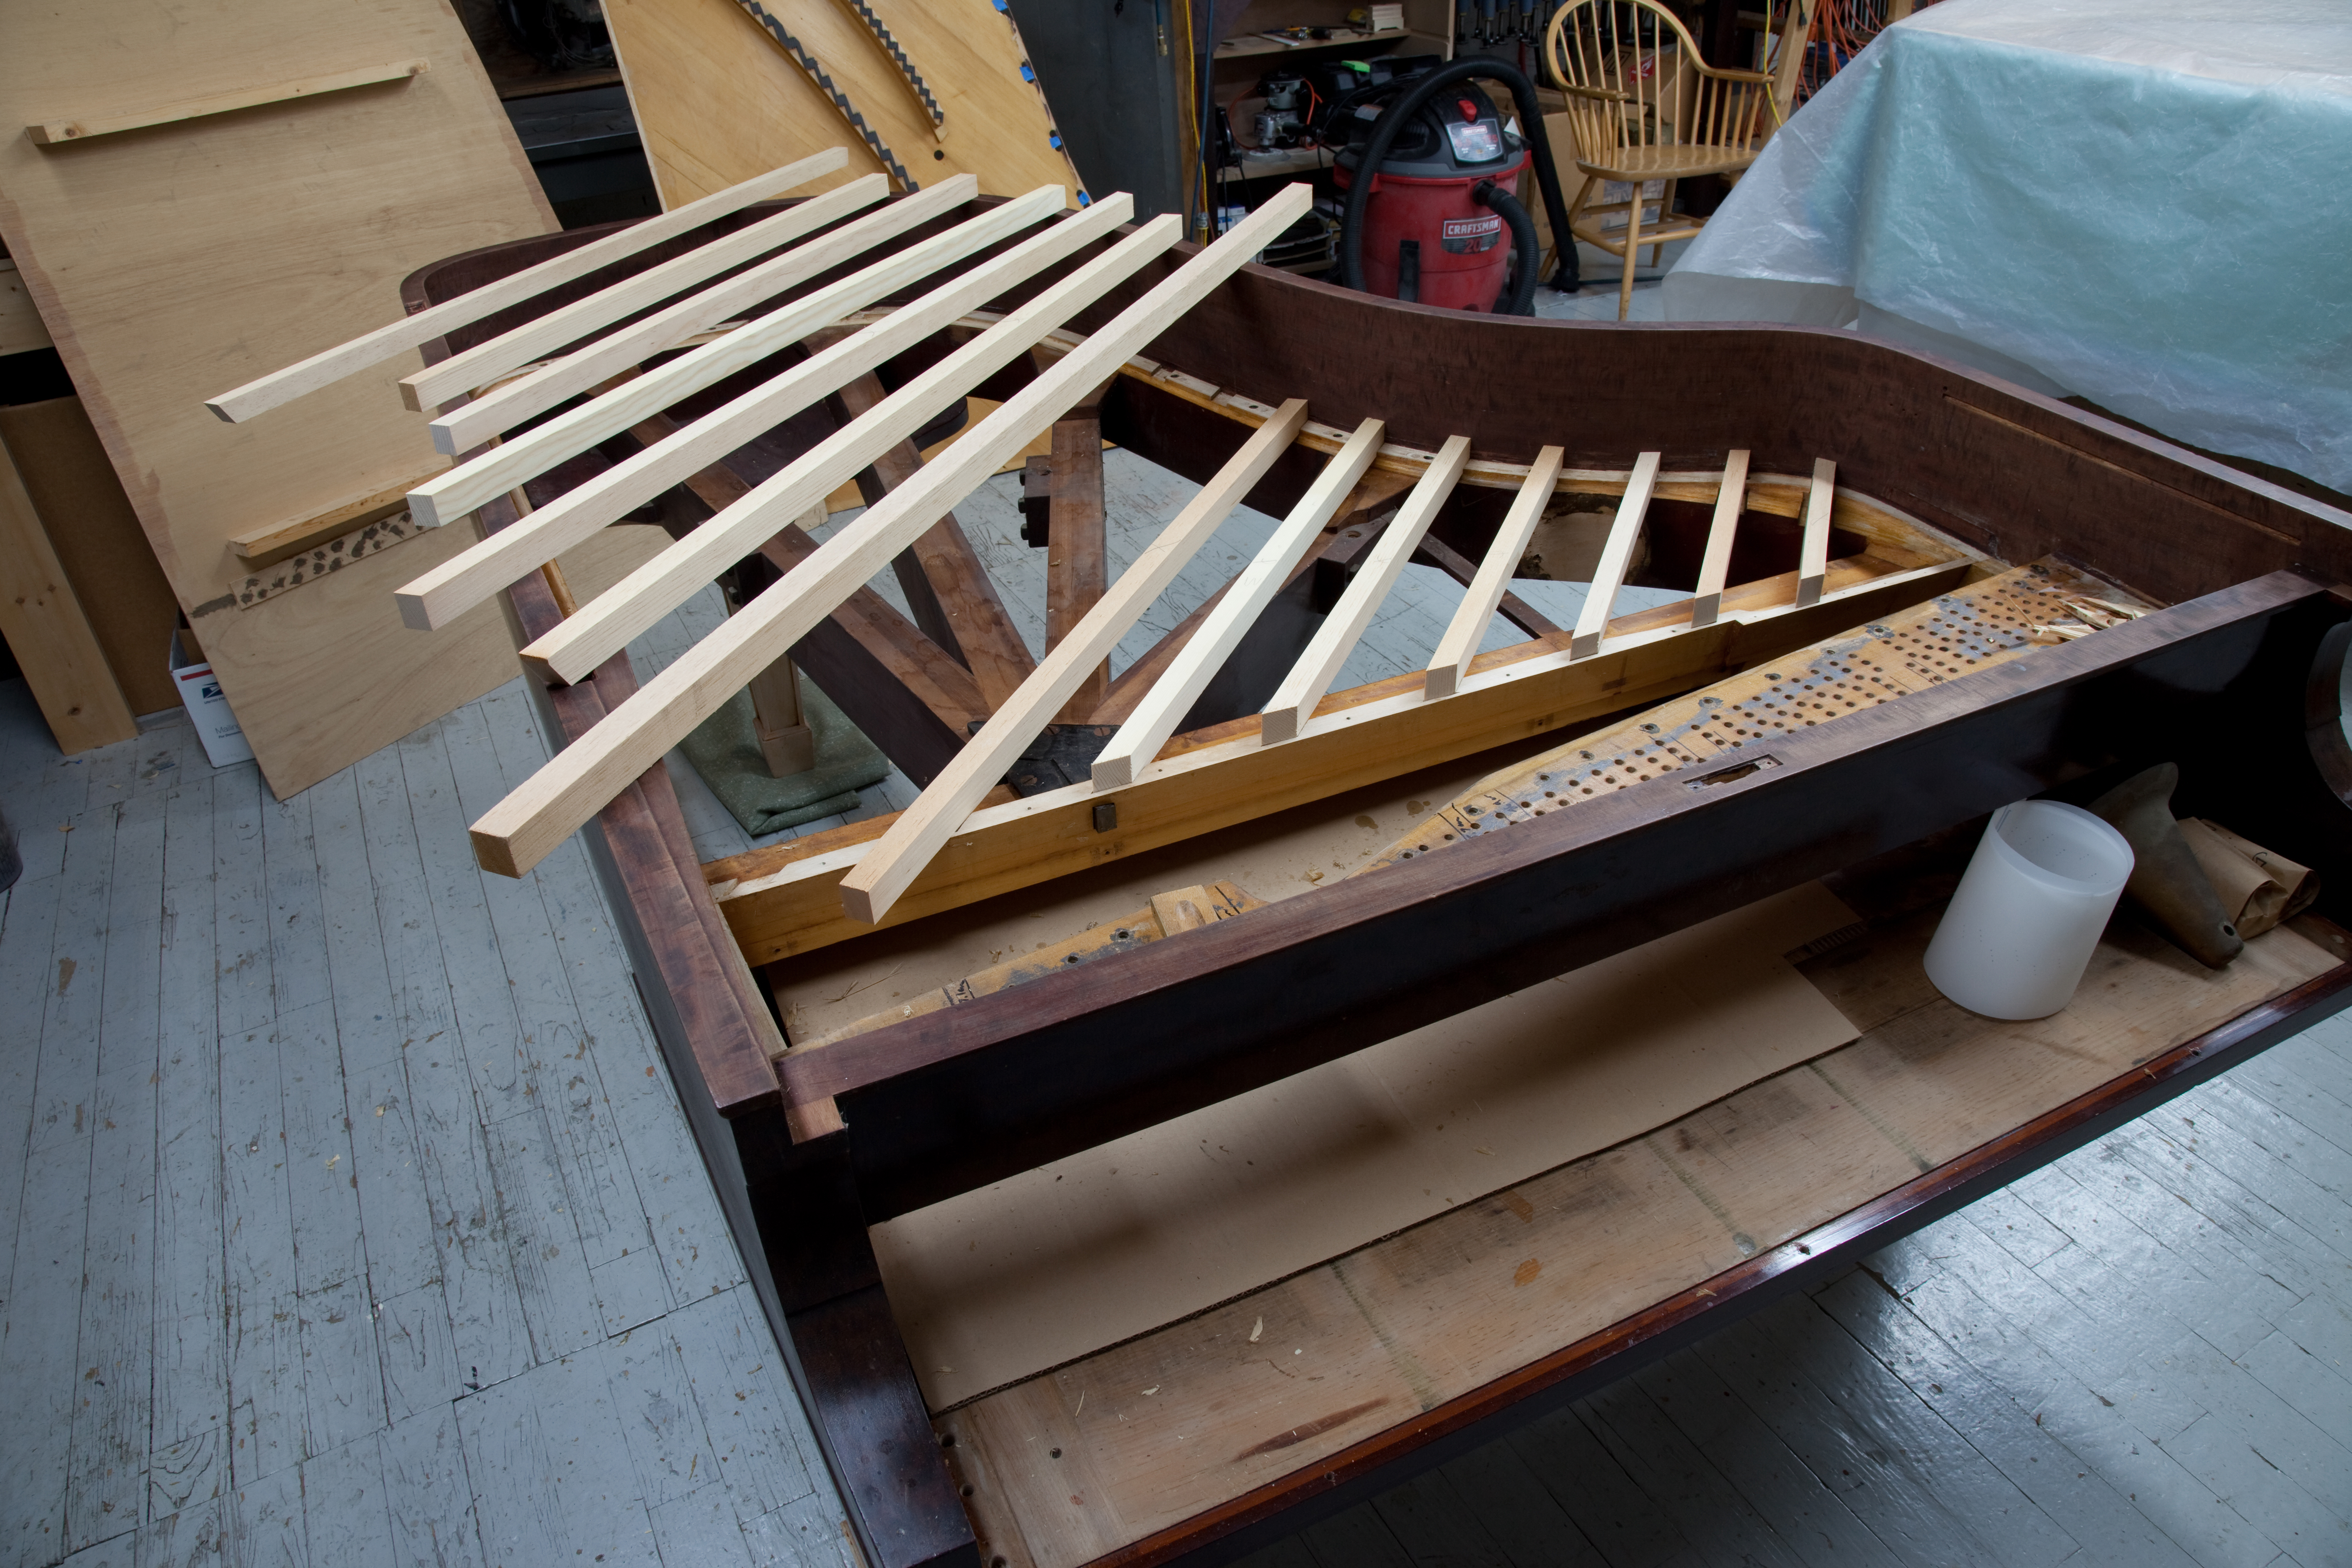
Ribs are selected, planed for proper width and cut to fit.

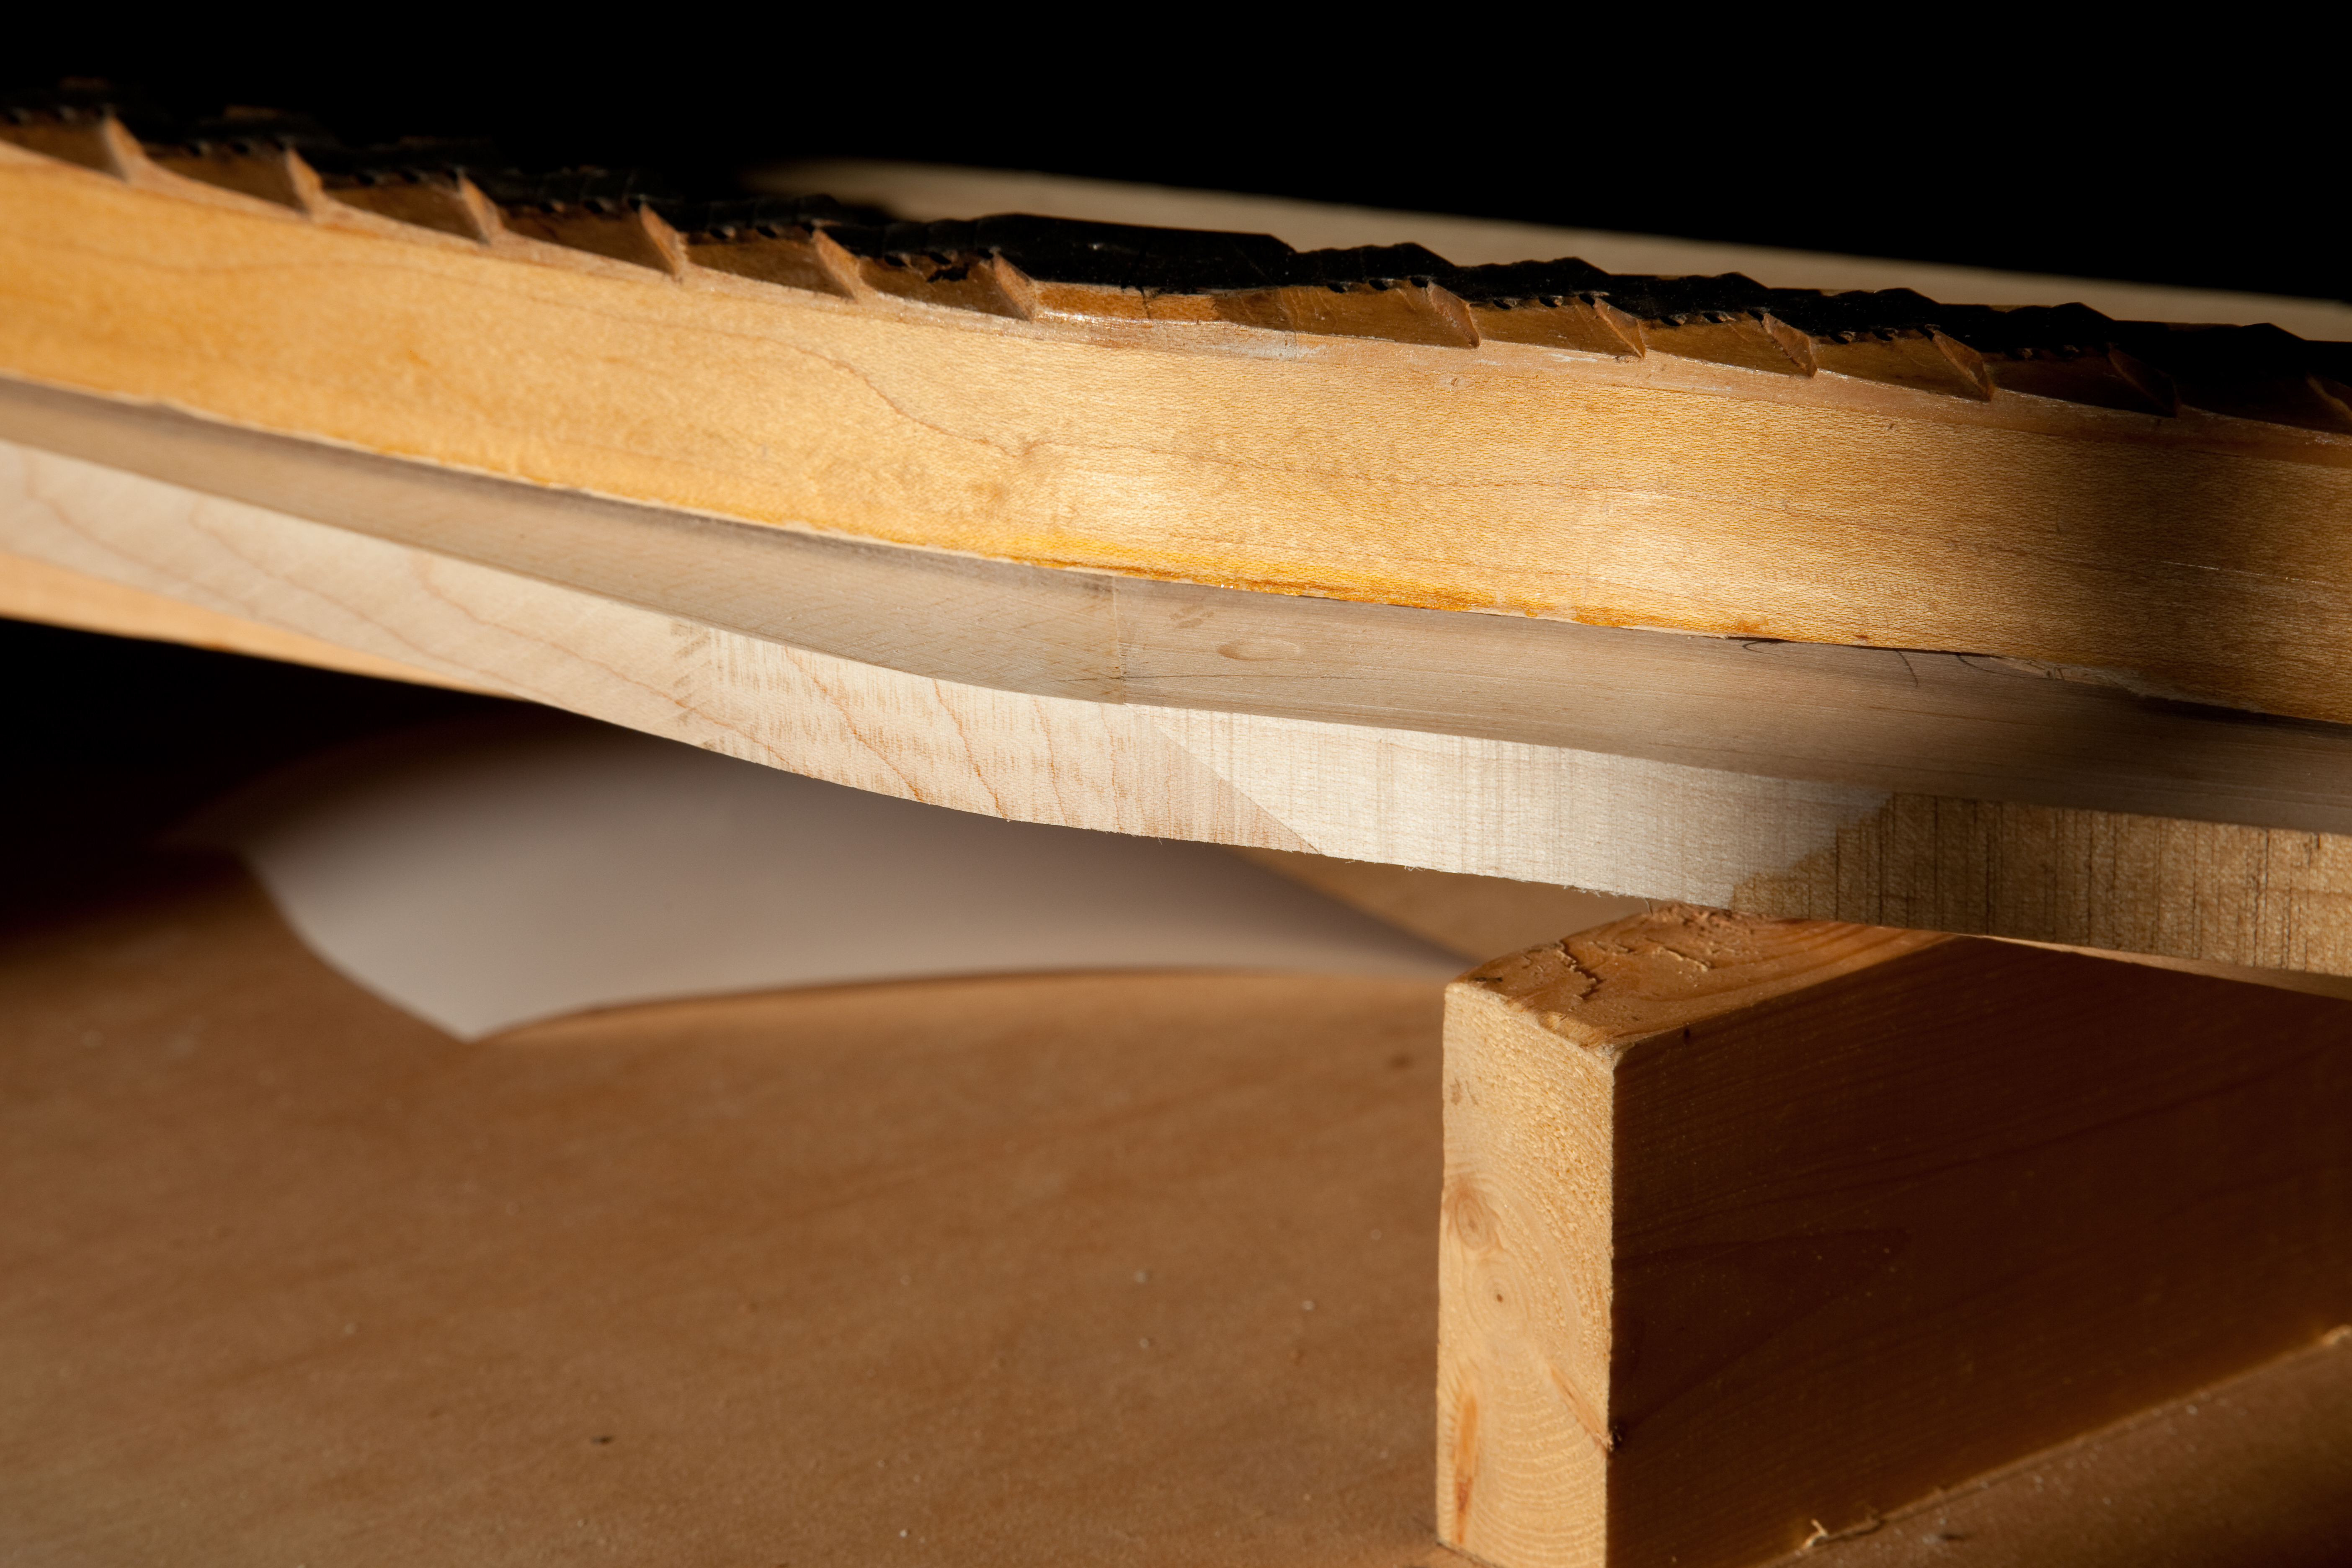
Shown clearly by the strait edge is the "reverse" crown. Boards in this condition are not capable of achieveiving good dynamic range, especially the fundamental tones.
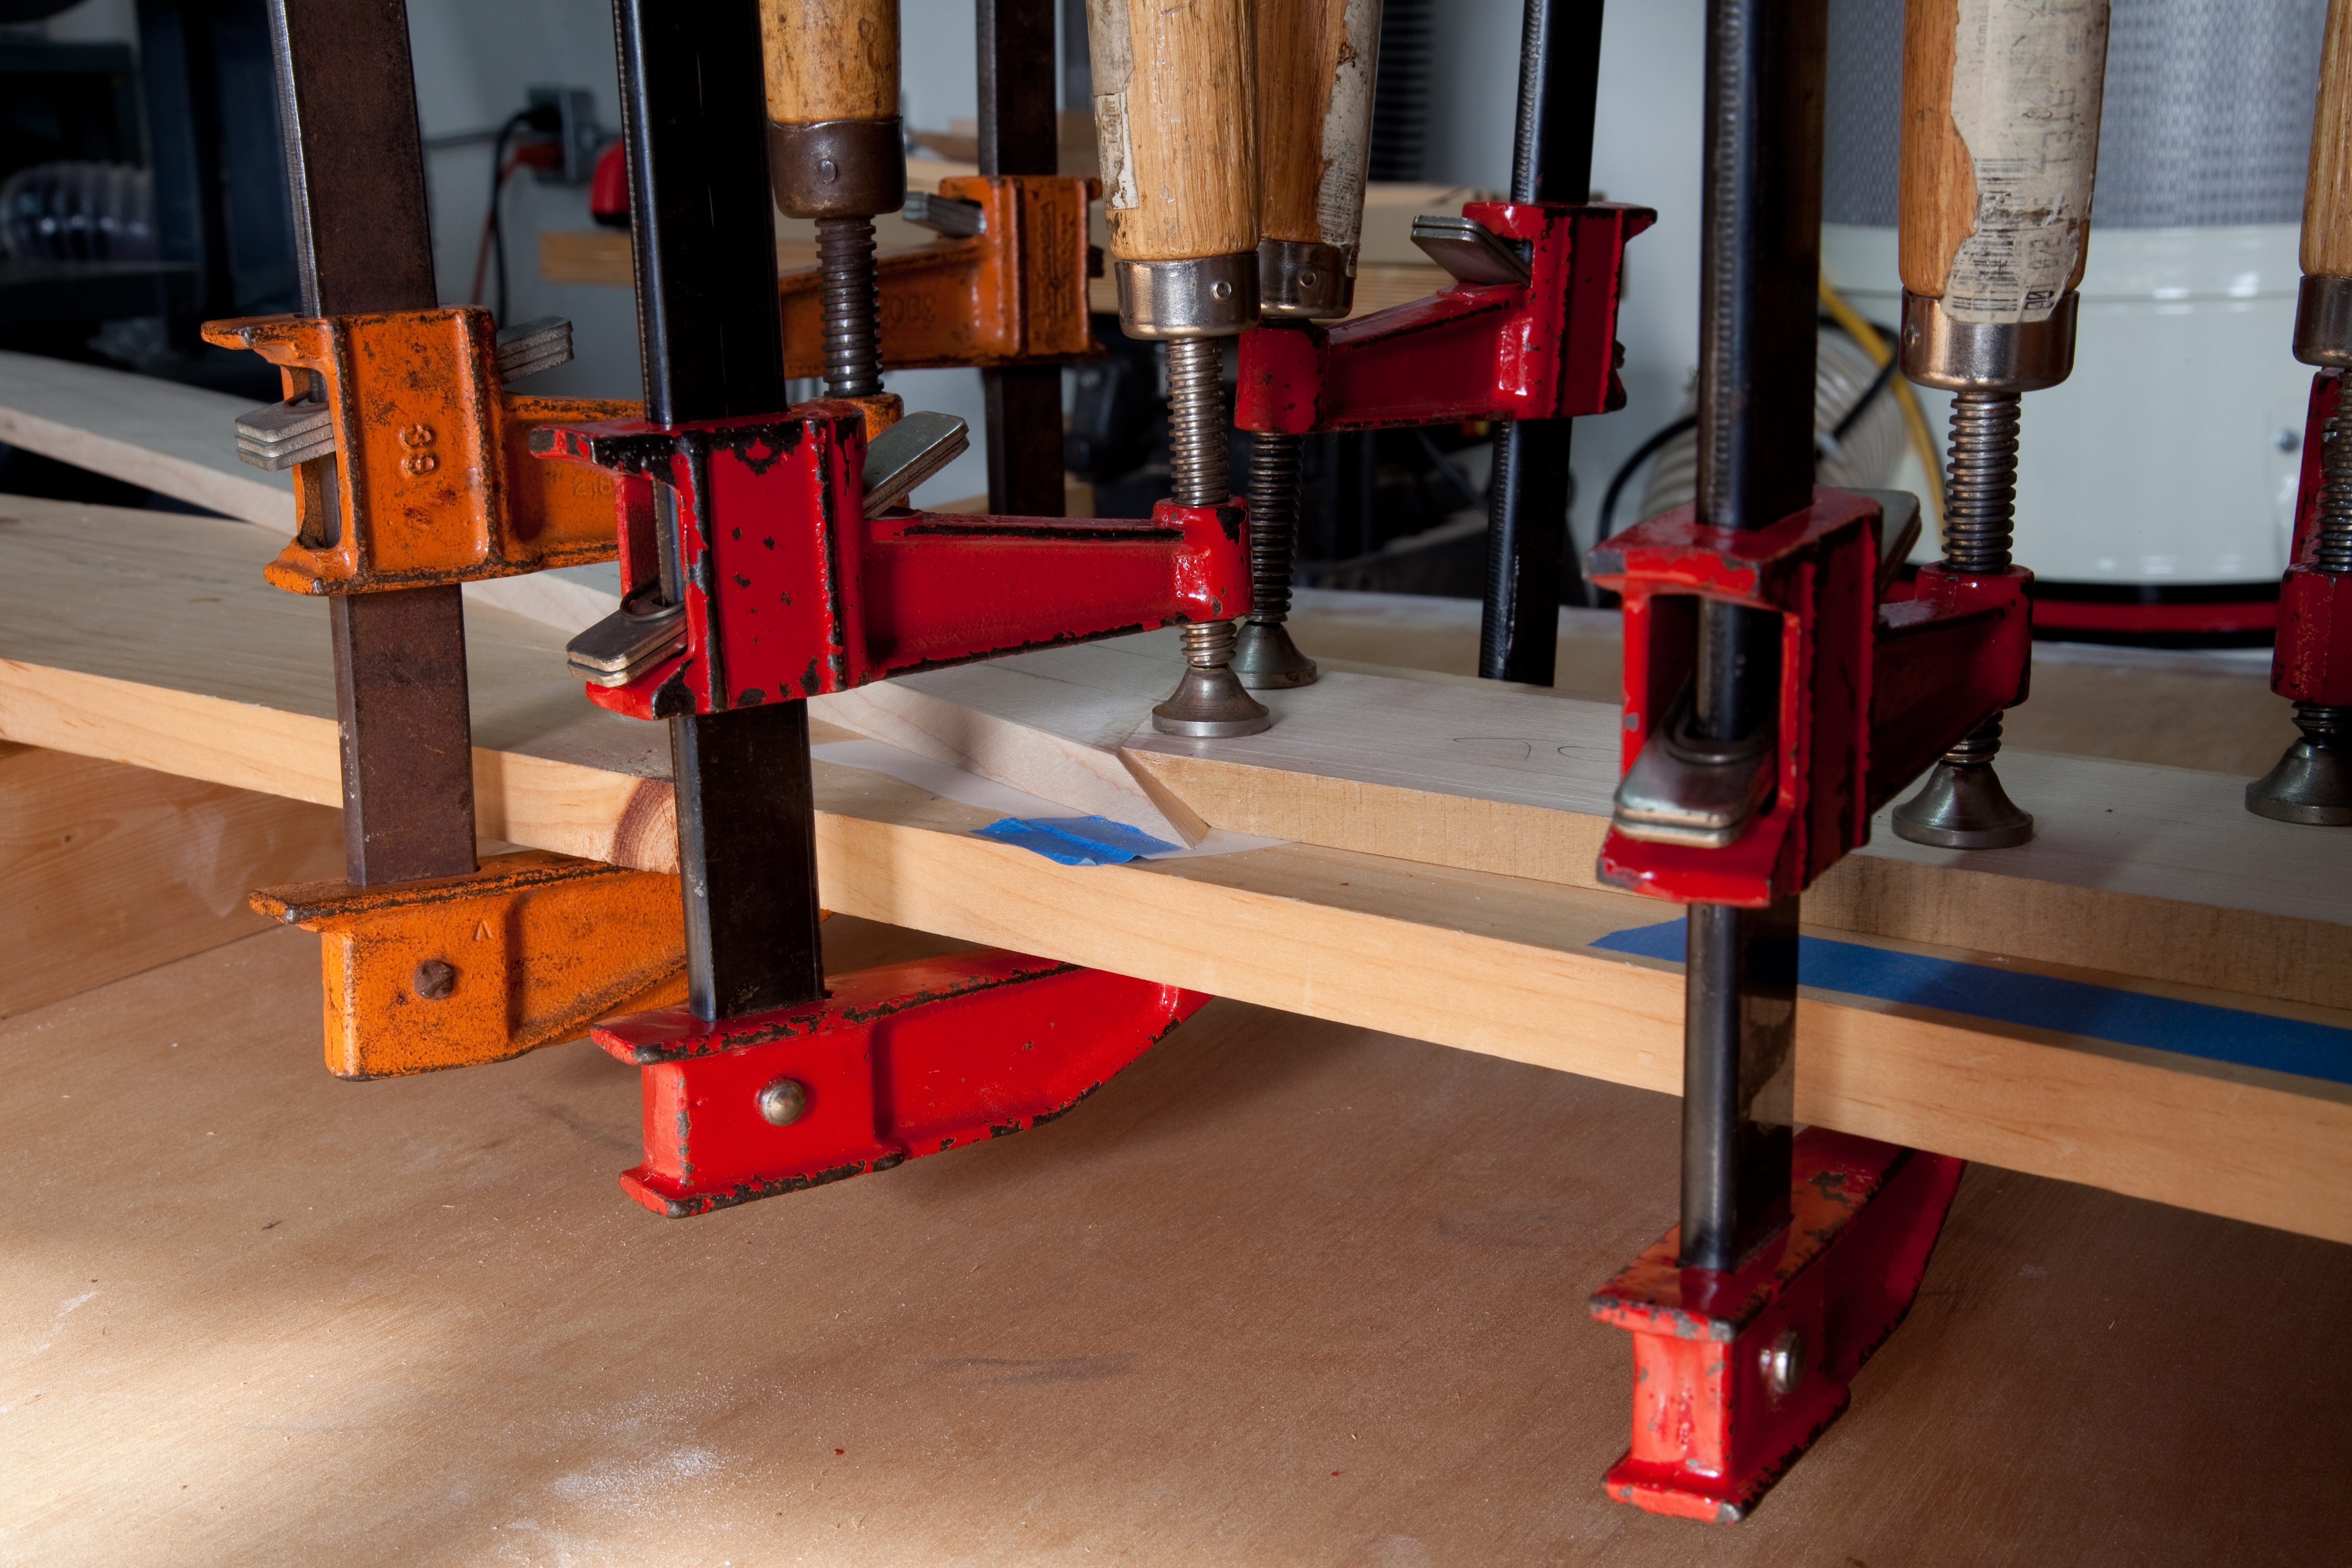
Pieces of quarter sawn hard rock maple are fitted and sized and then scarf glued.
This is a much stronger joint.
Now, the old bridge is laid on top to show how the glue joints align with the strut point on the old bridge.
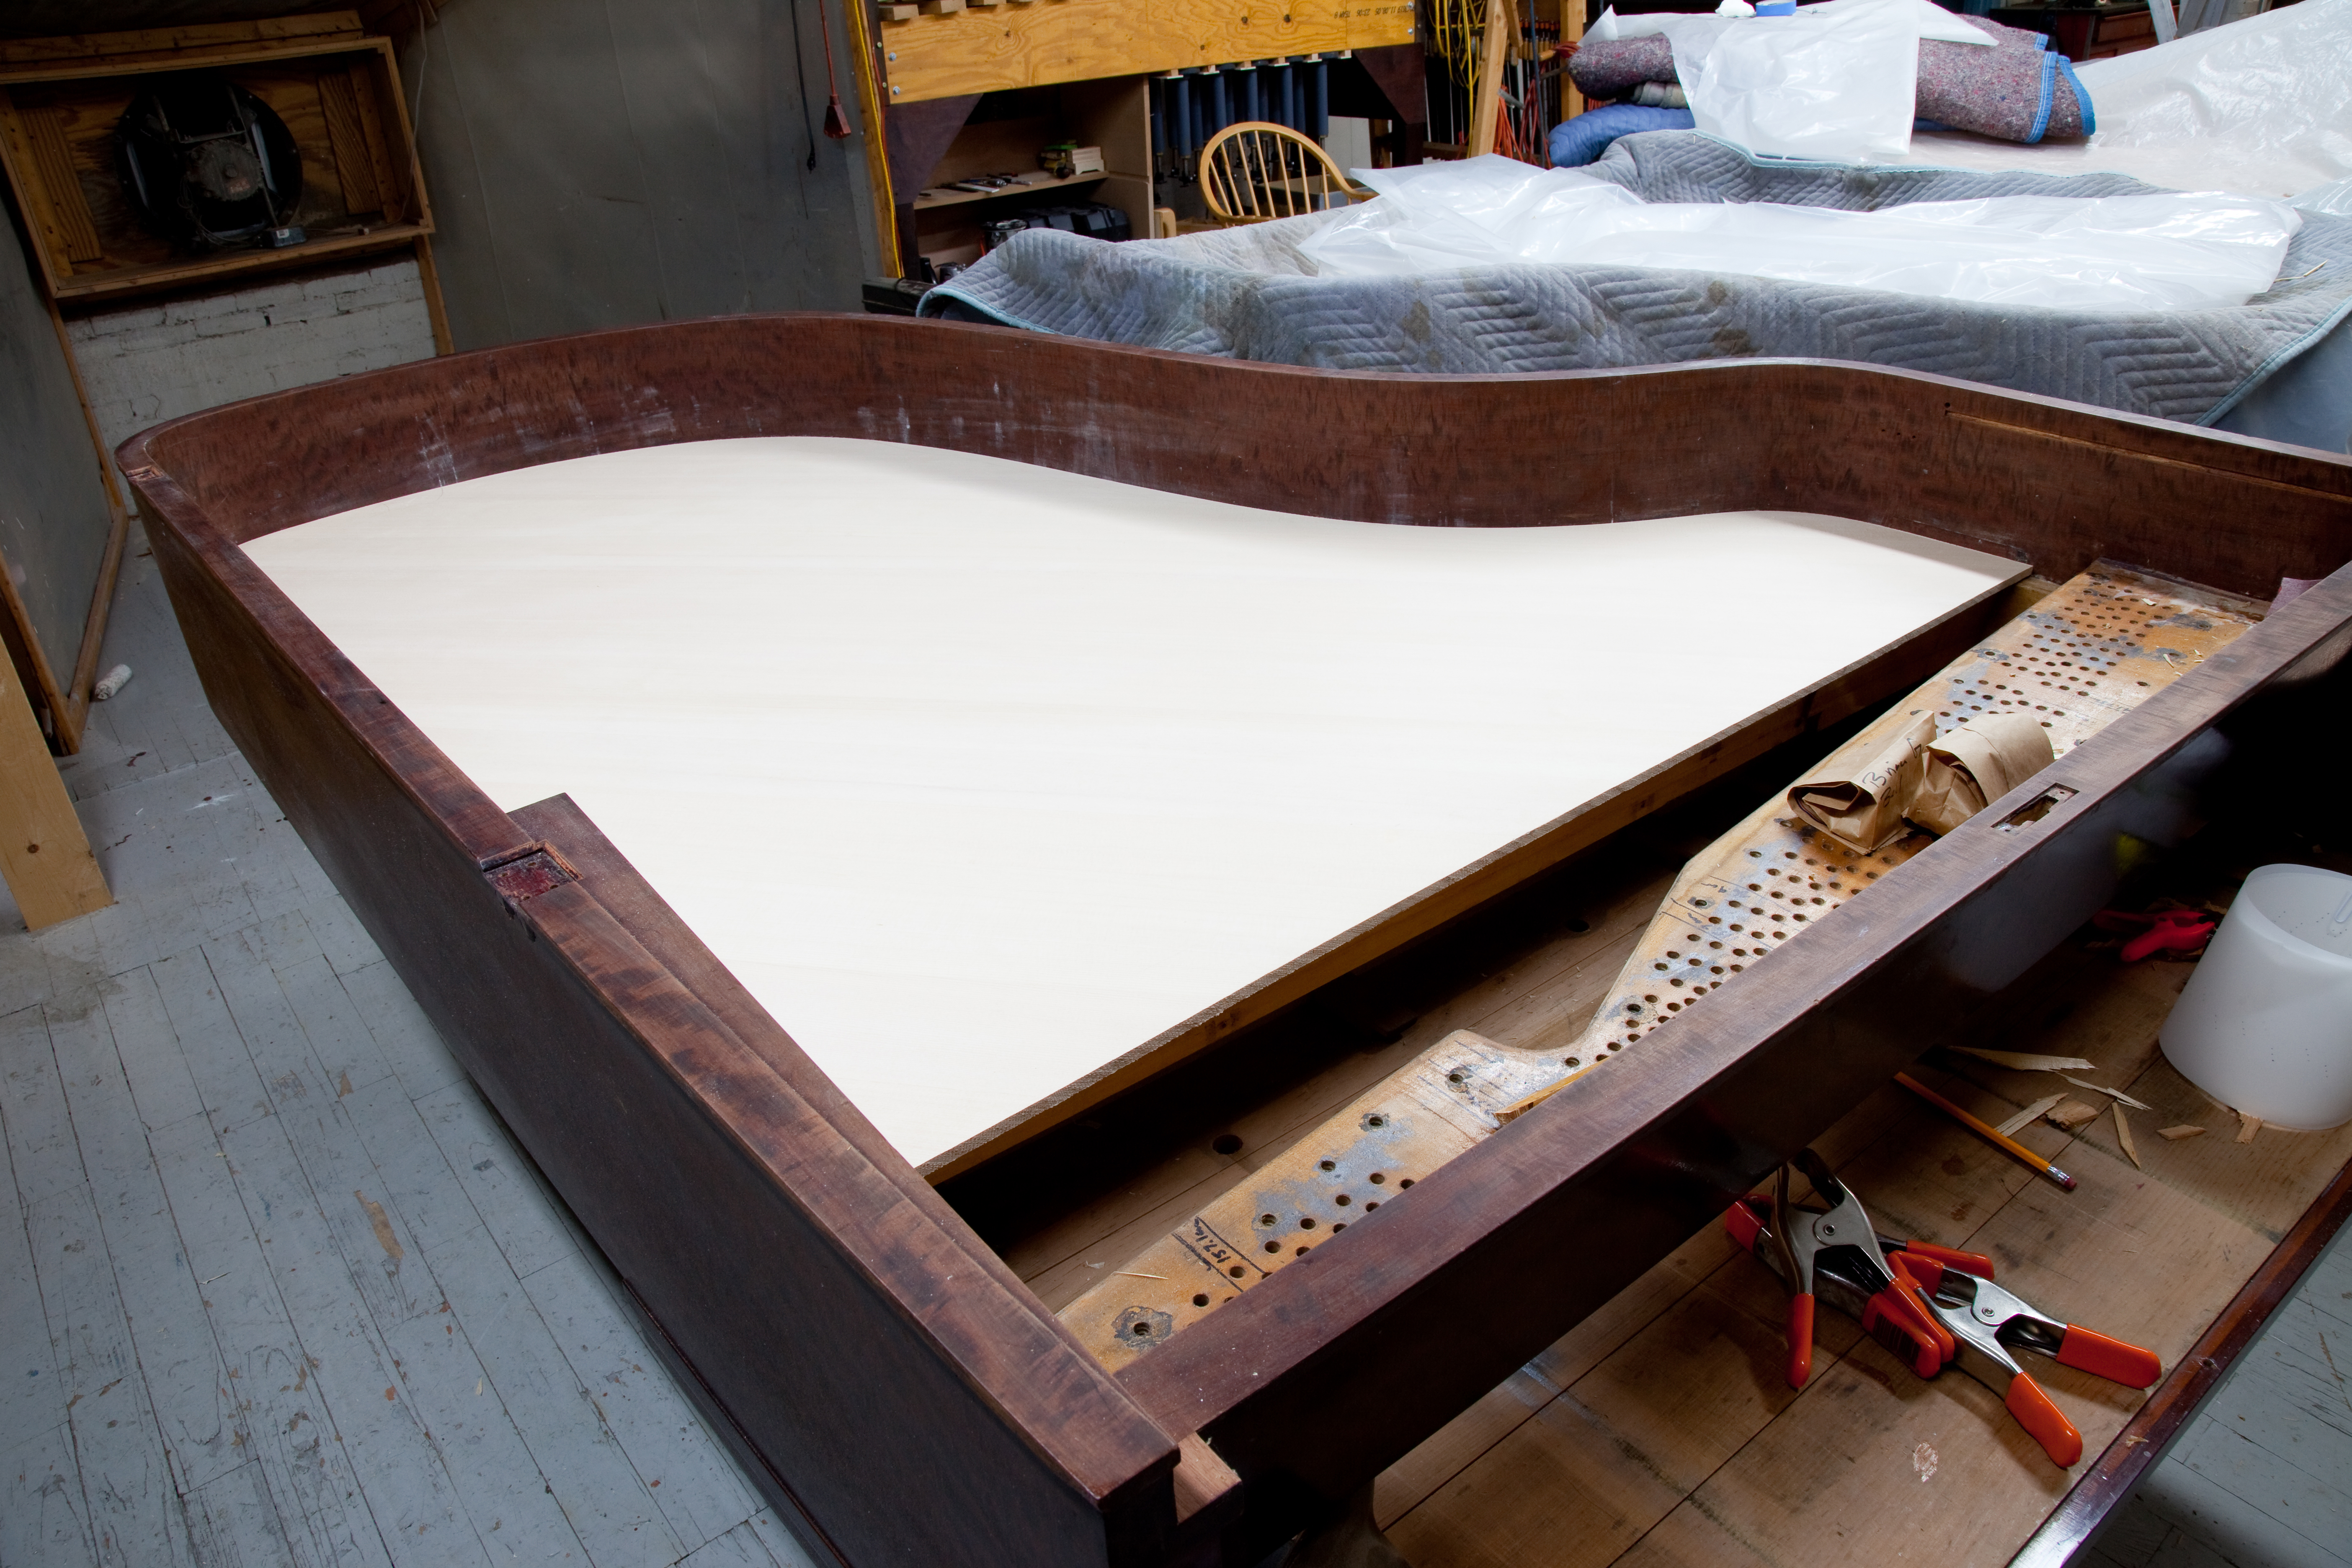
This is a panel of quarter sawn Sitka Spruce. The shape is very carefully fit to the rim.
From here, the ribs will be glued to the panel in the process called "bellying" the sound board.
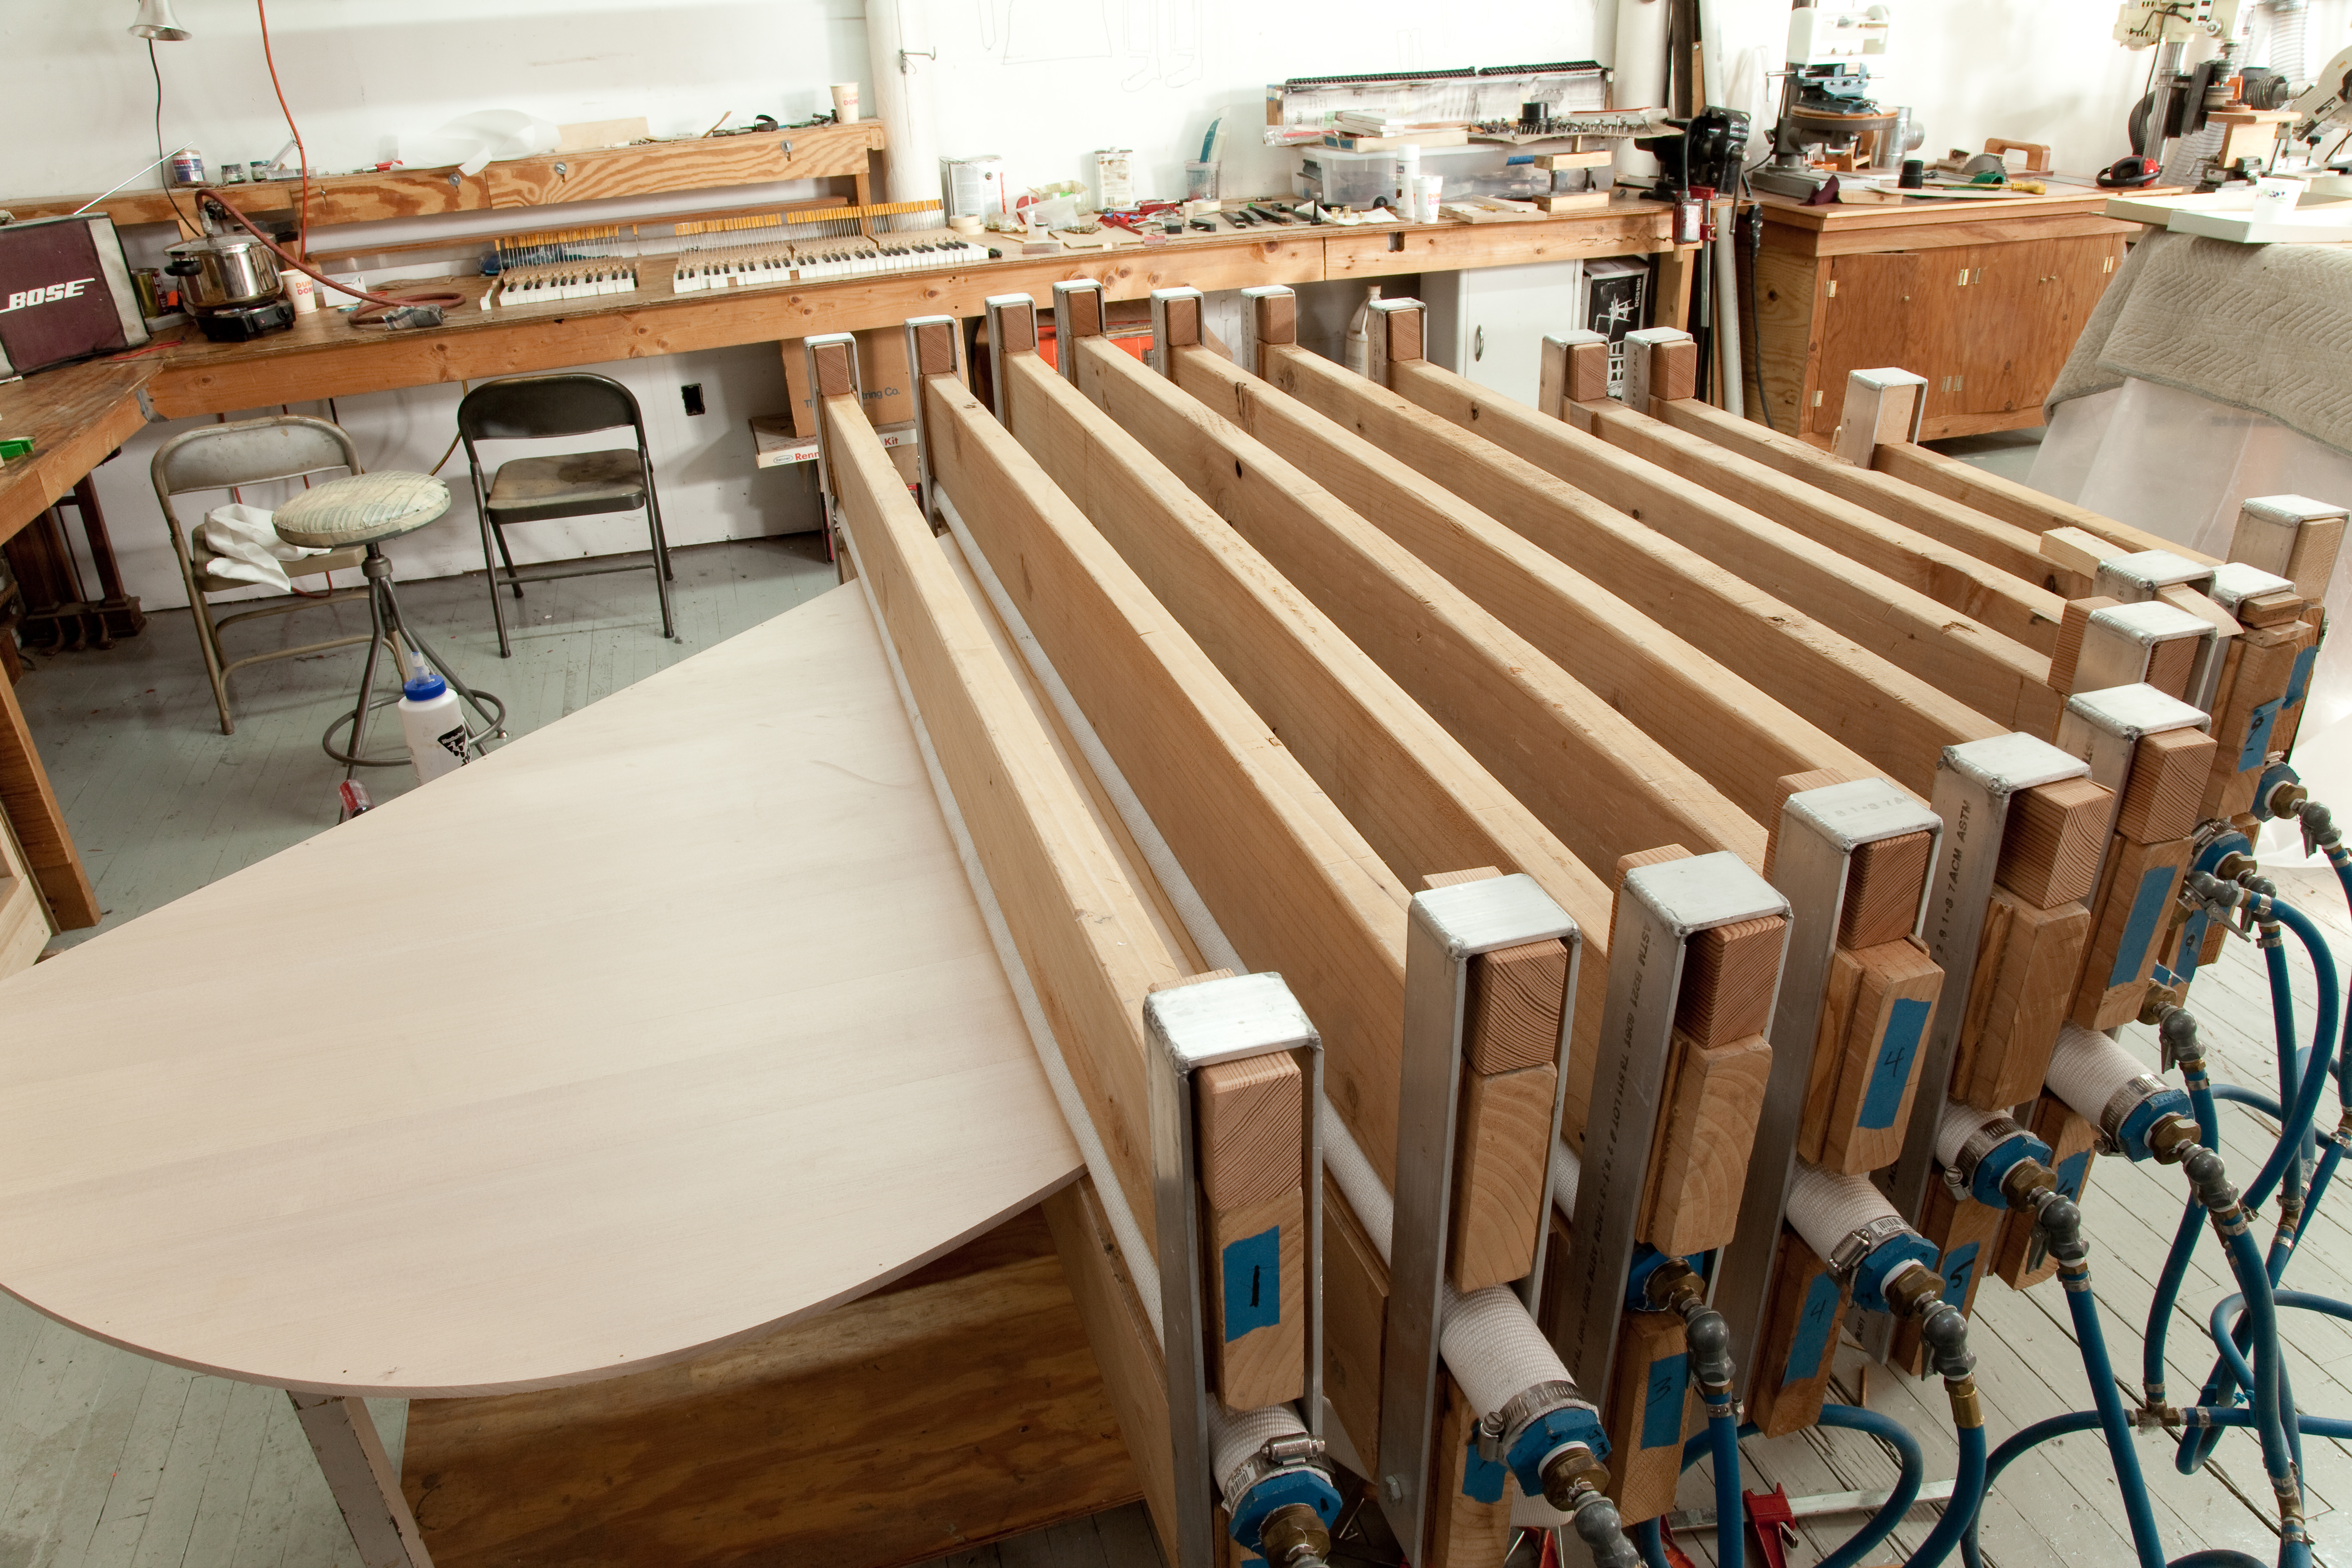
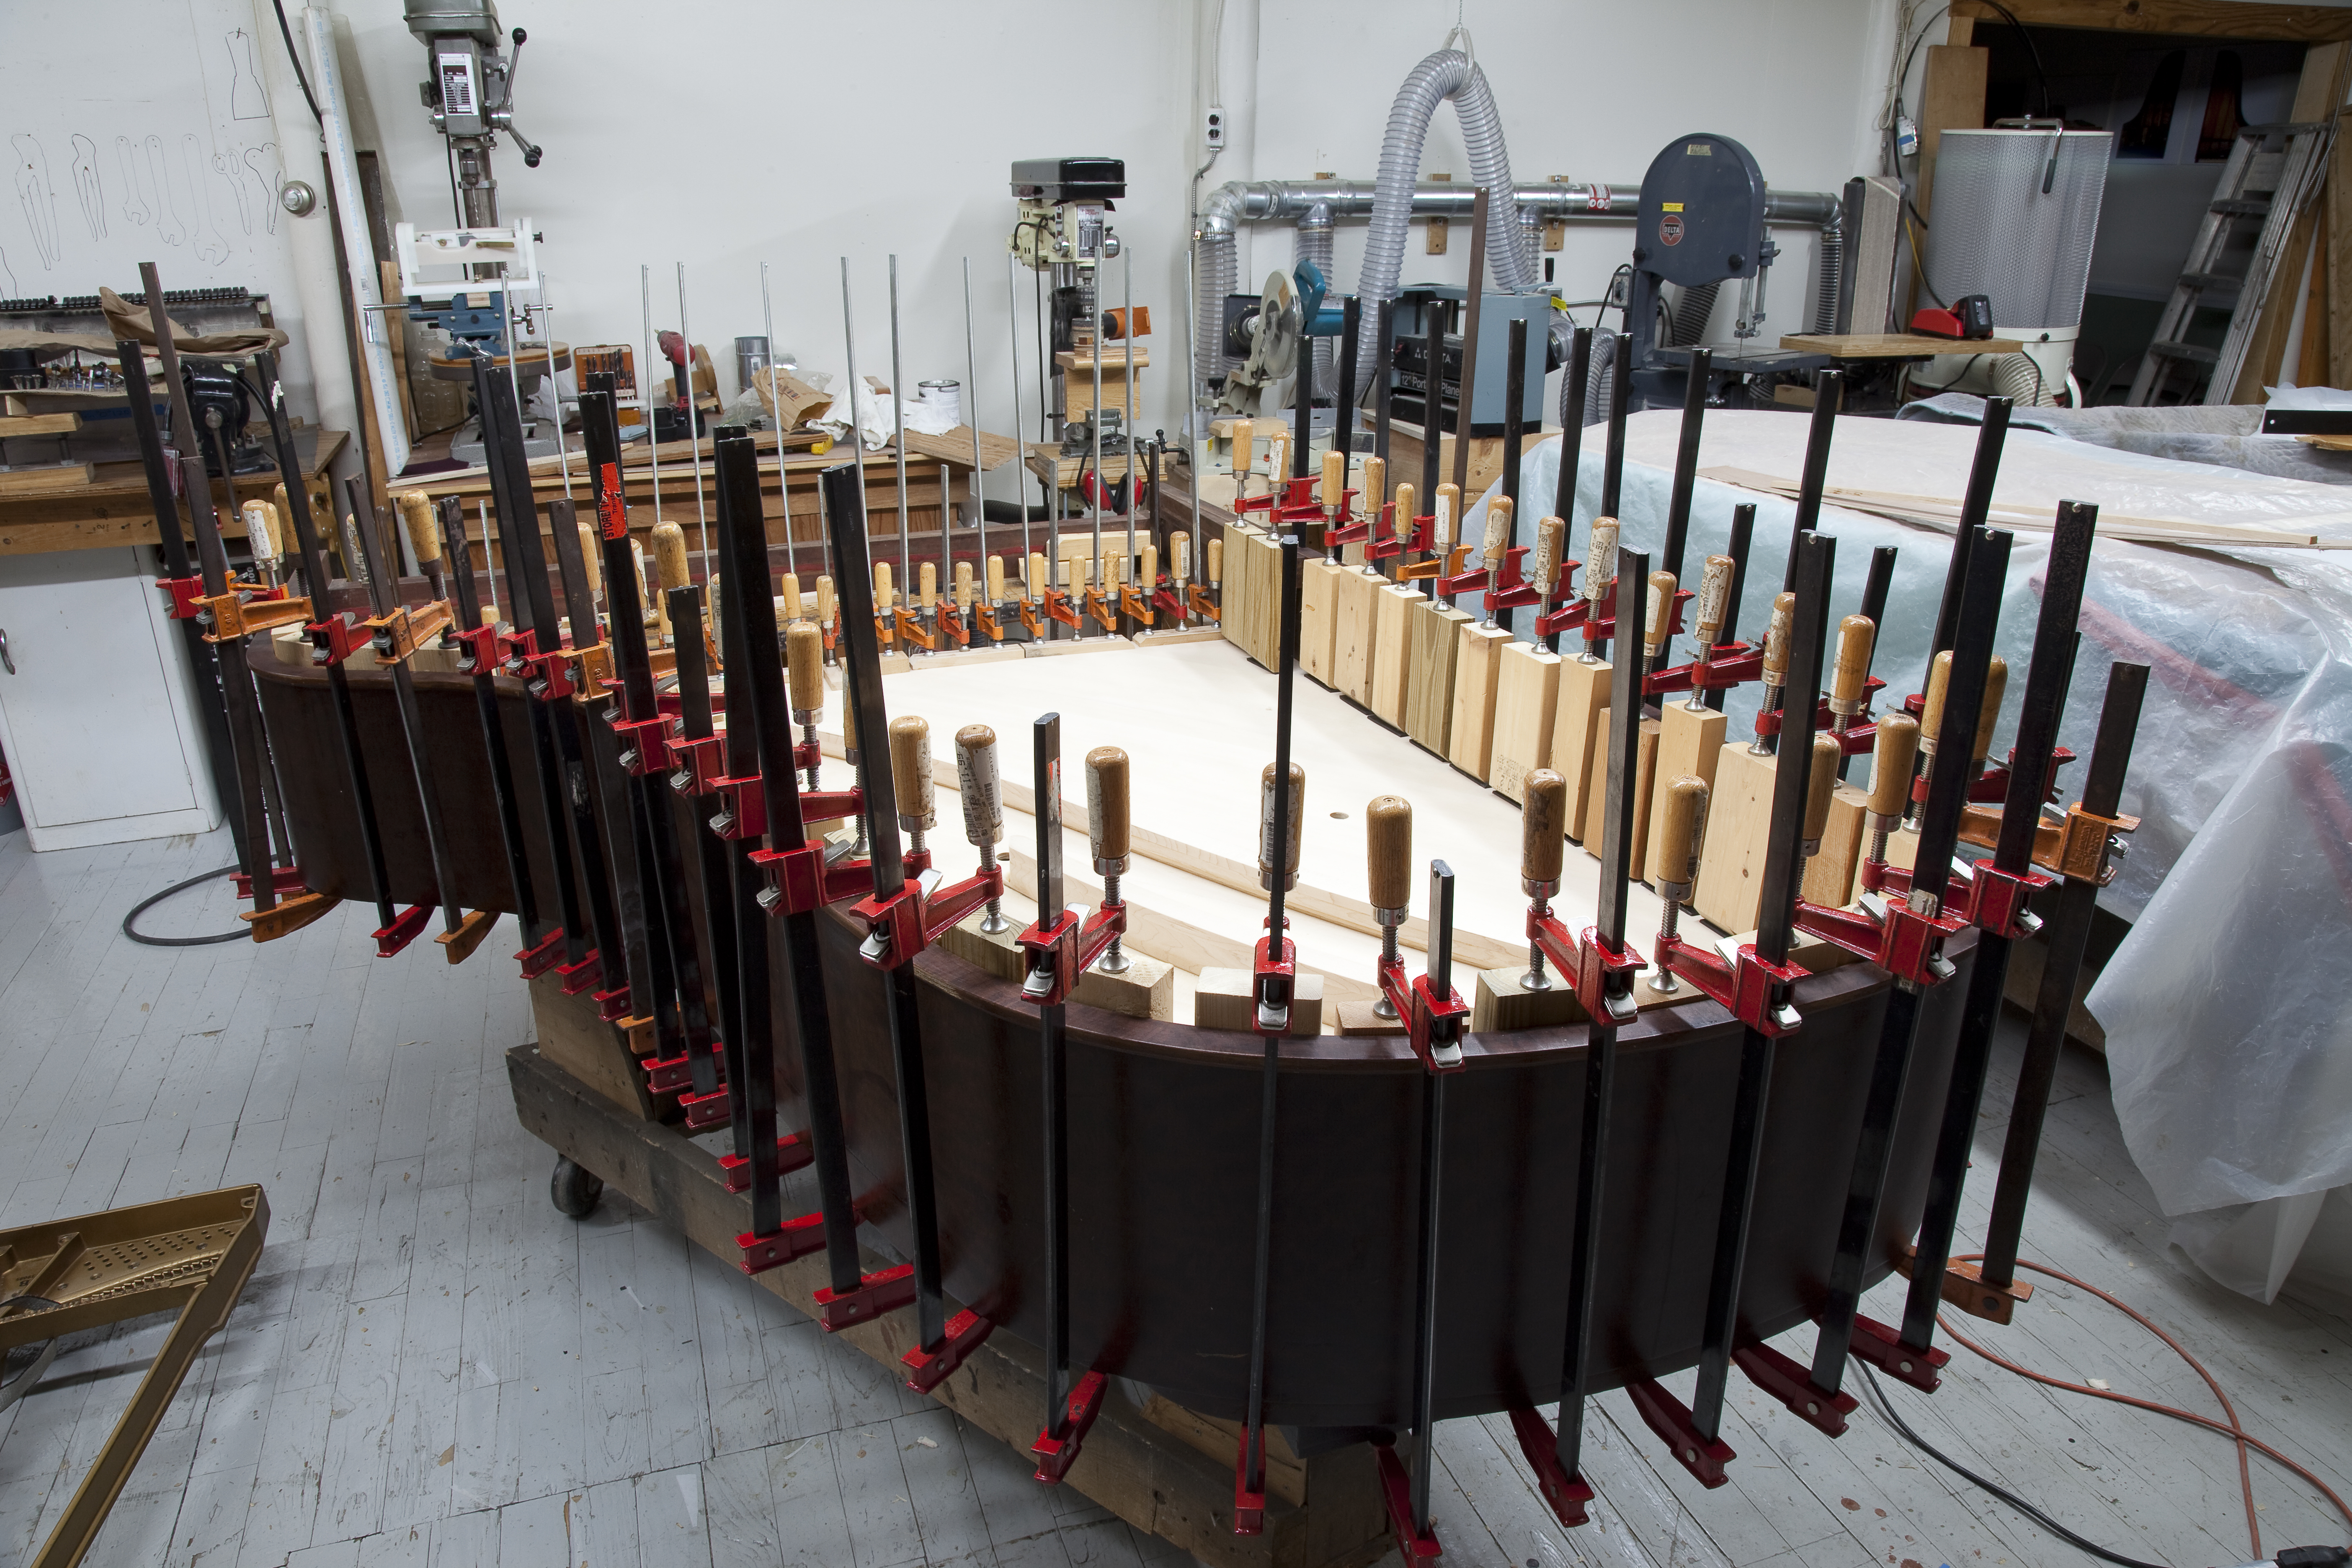
The ribs are being glued onto the board in a special press.
This Steinway B has 14 ribs, 10 are in place, 4 more to go.
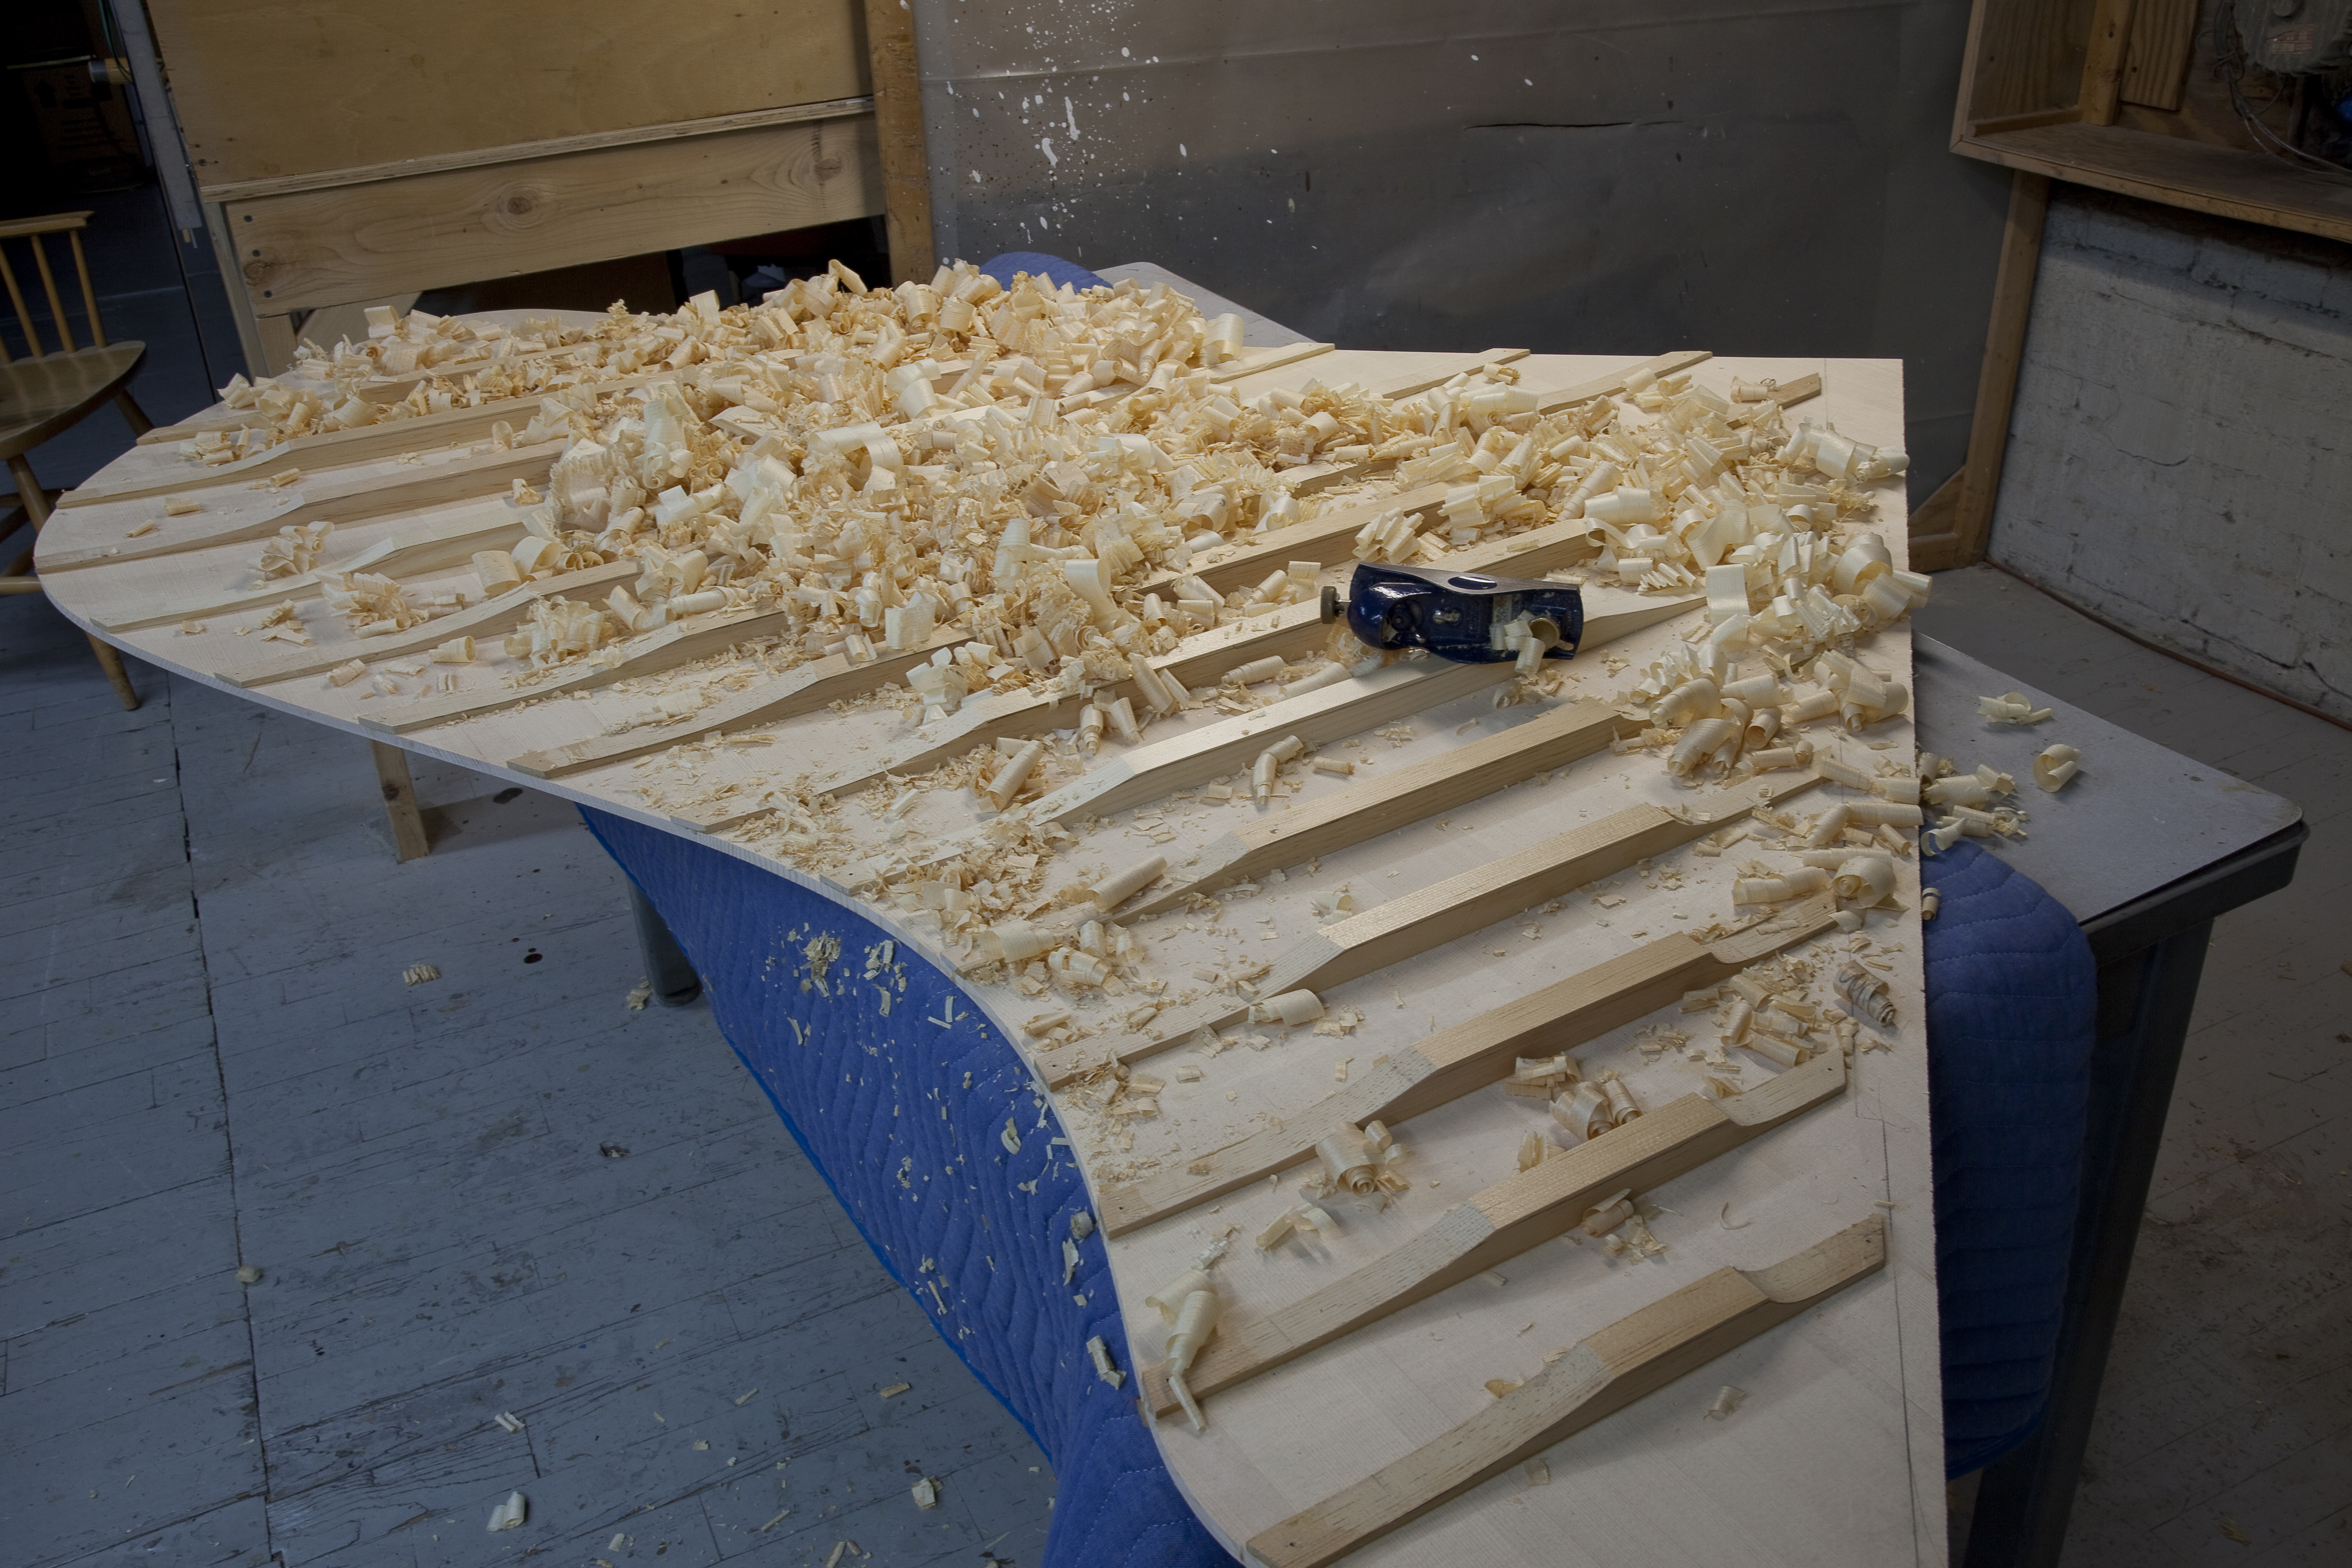
This is the beginning of the rib shaping
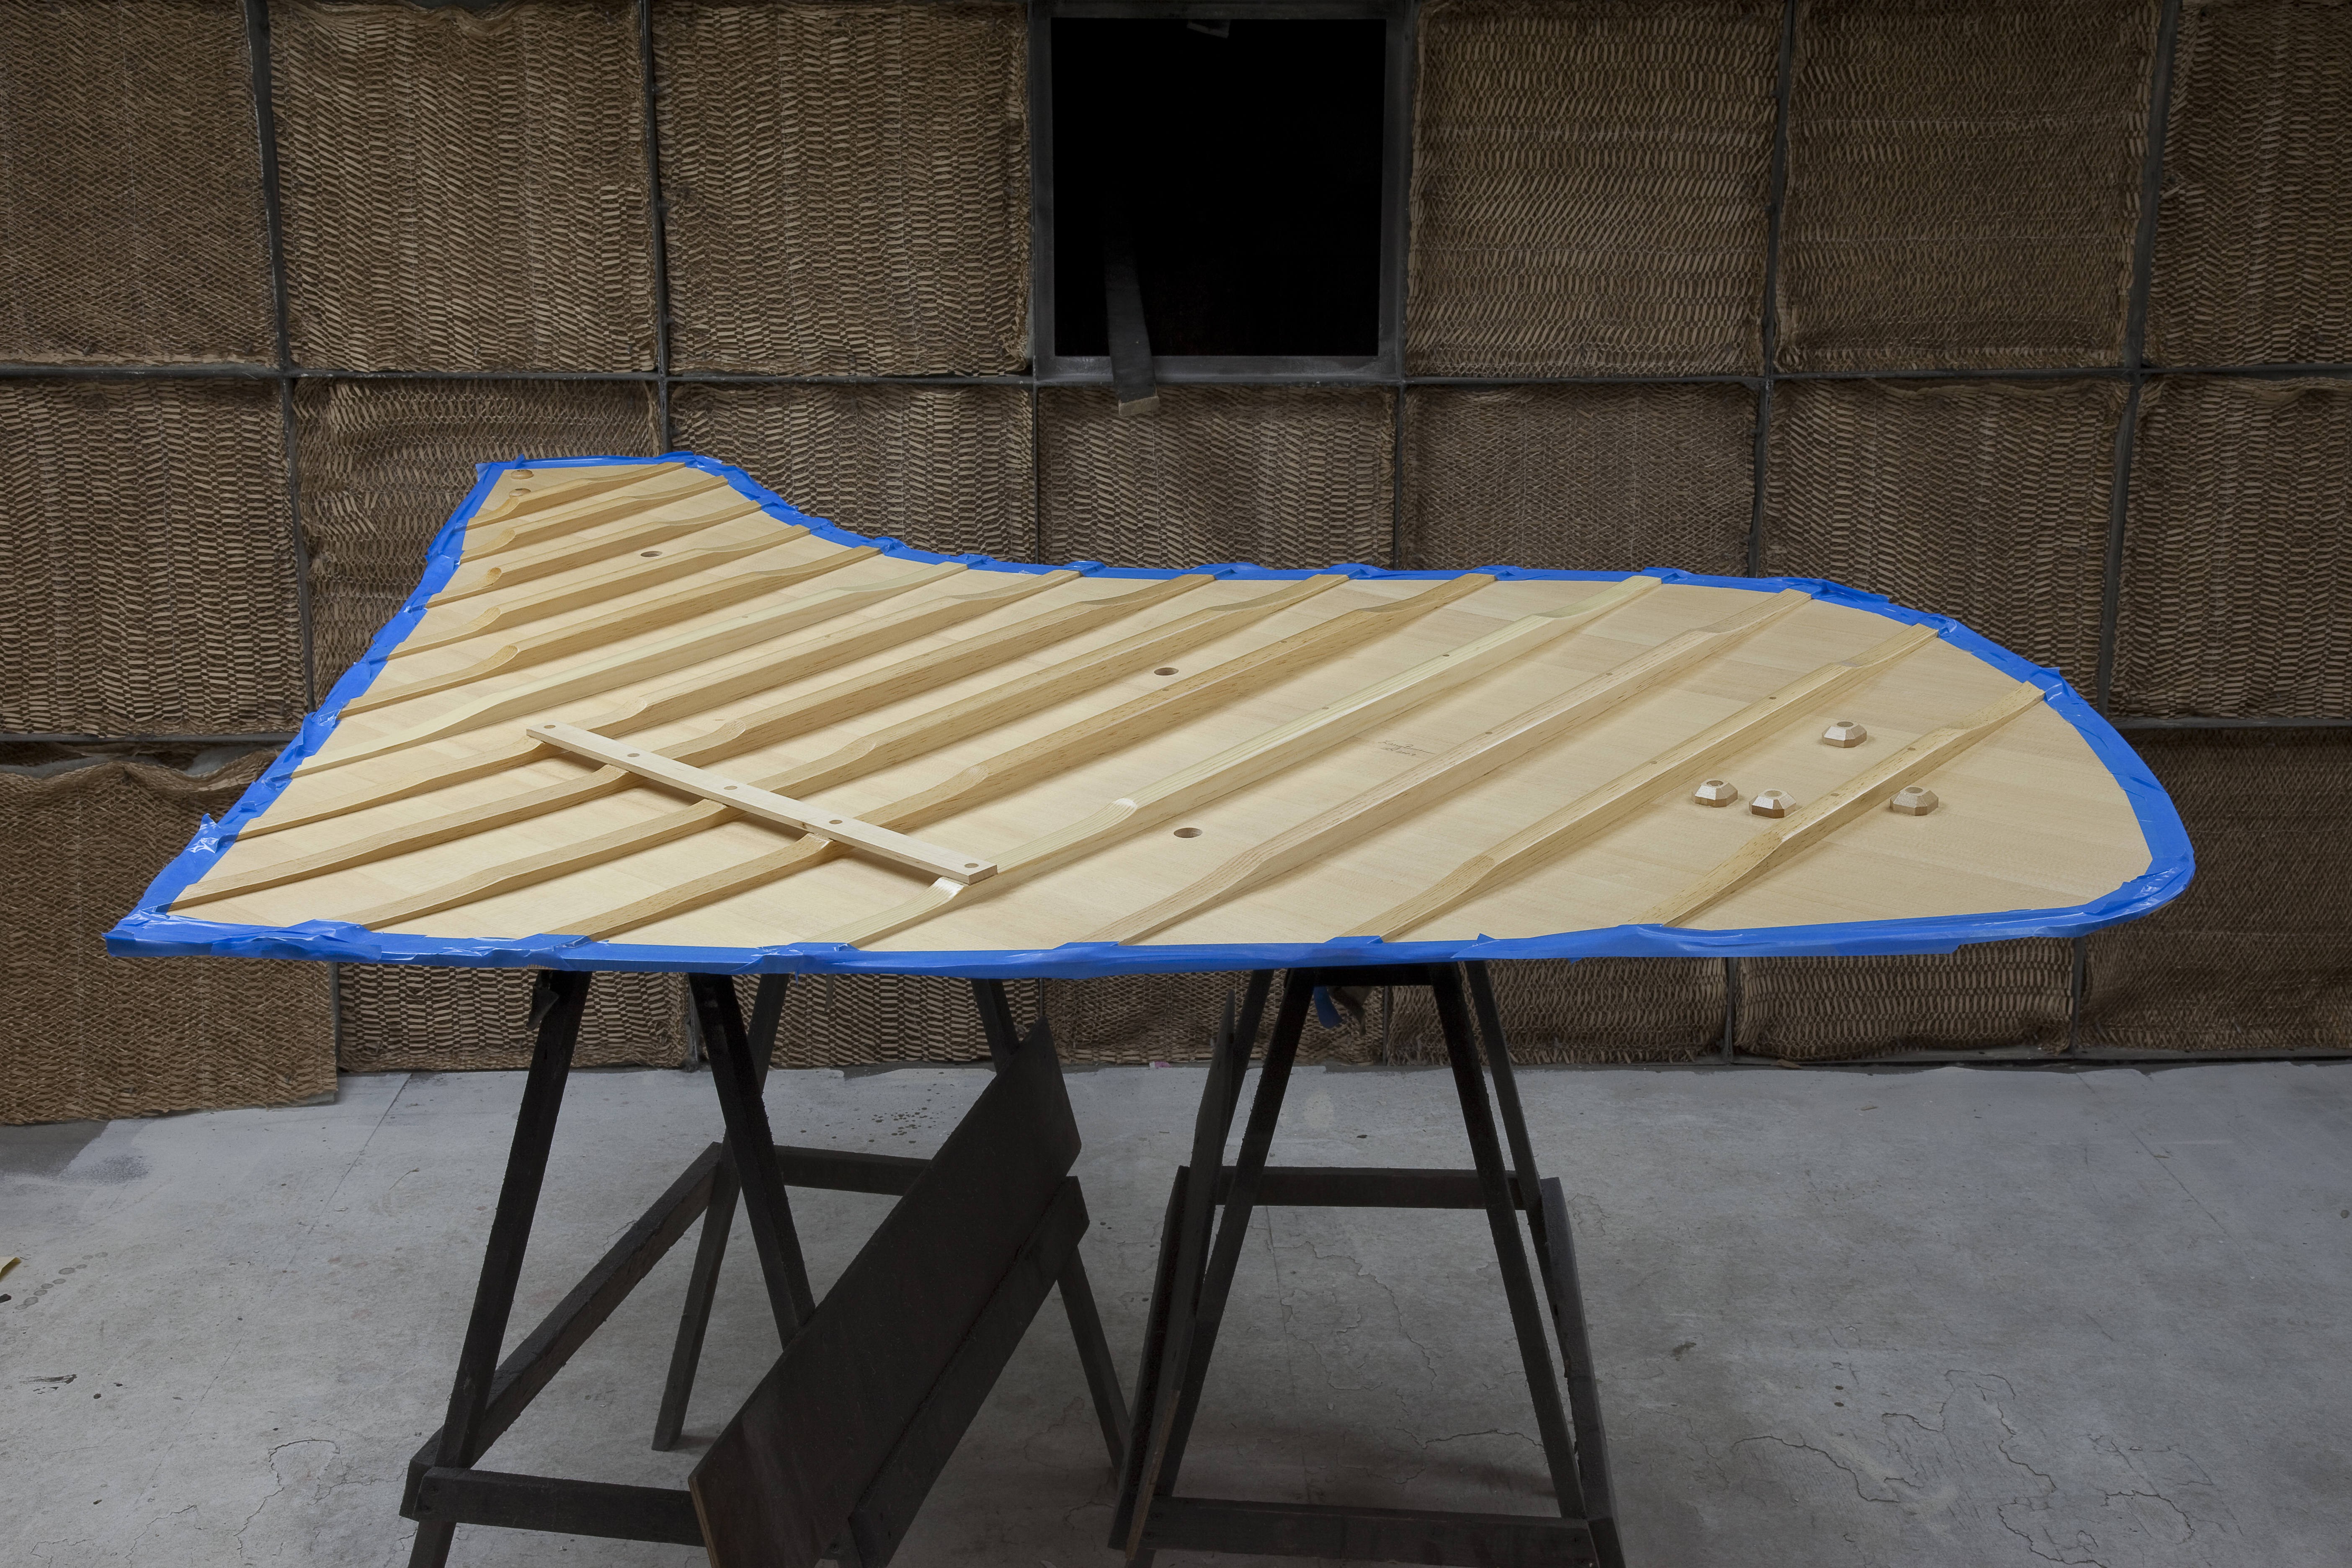
Here the finish has been applied to the underside of the sound board. The blue tape is in place to prevent finish from beinng applied where the glue is to be applied. It is very evident here the crowned shape of the board both along the ribs as well as along the bridge (Underneath and perpindicular to the ribs).
Sound Board being glued in.
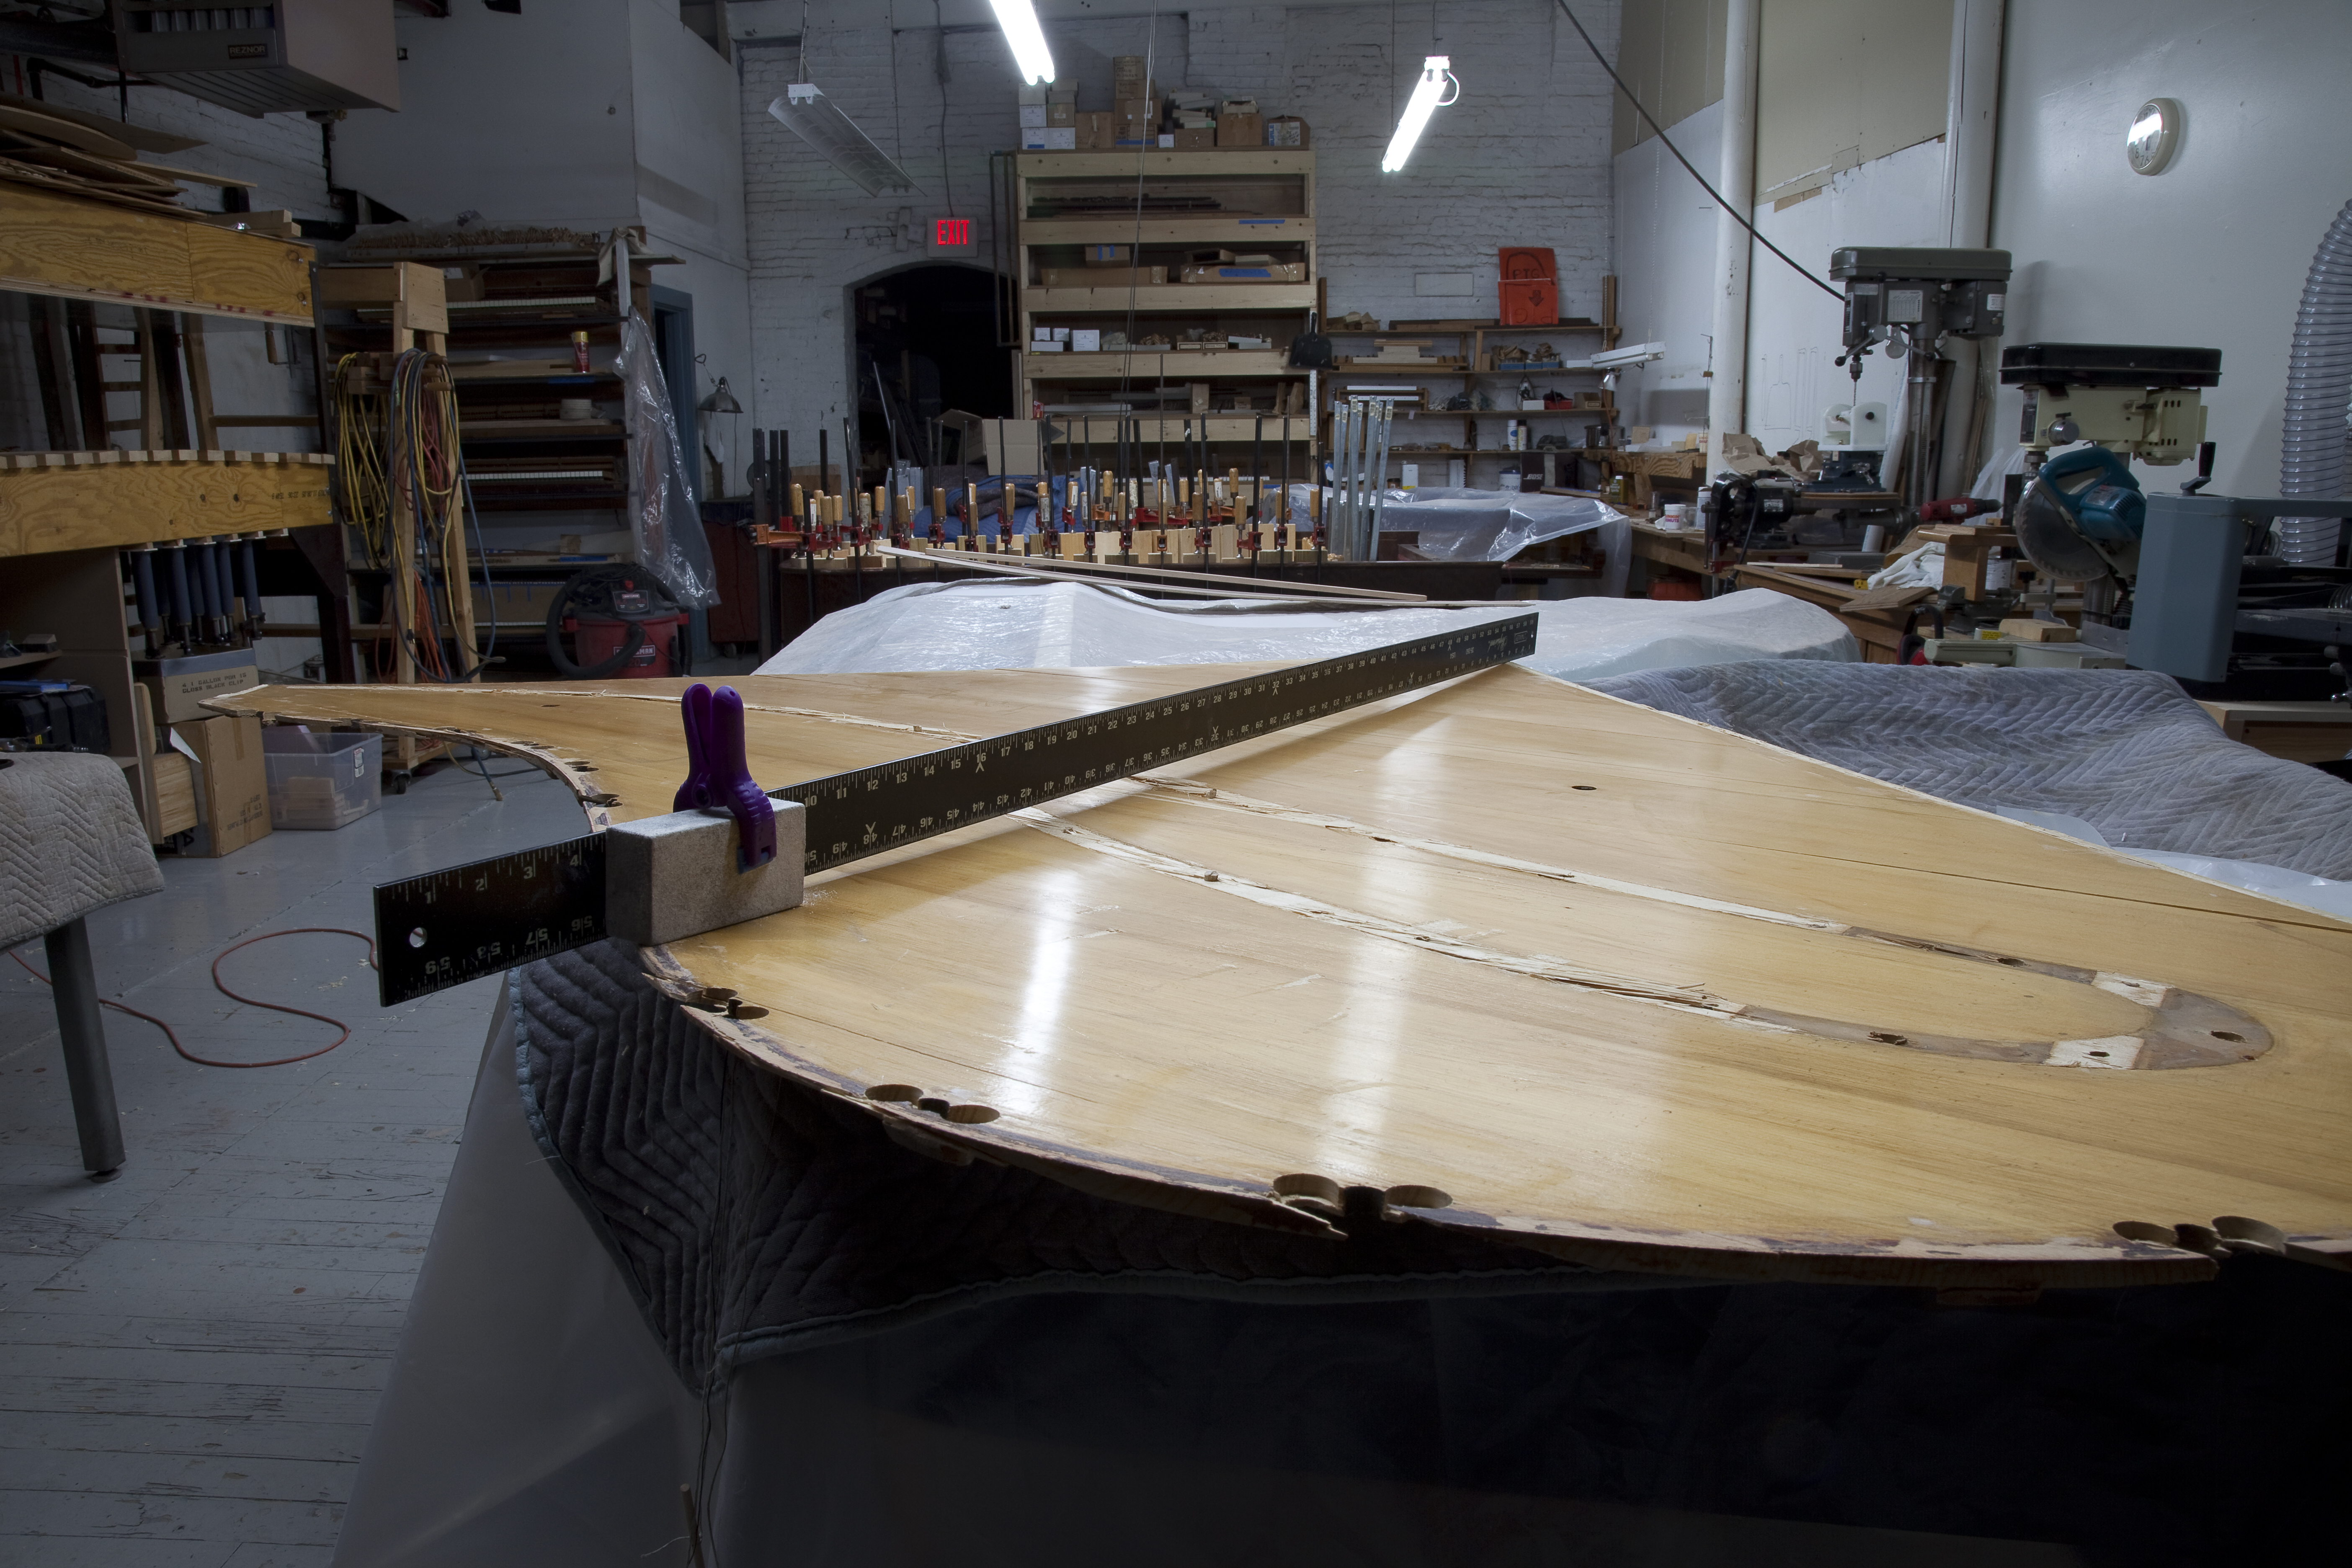
A parting shot of the original sound board. The strait edge clearly shows the severe reverse crown of the old board.